For your backyard pool project, focus on cost-effective options like above-ground pools or vinyl liners that offer 7-12 years of enjoyment. You’ll save 30-50% by choosing geometric shapes and handling simpler tasks yourself, like decking installation. Consider eco-friendly features such as solar-powered accessories and natural filtration systems to reduce operating costs. Position your equipment strategically and incorporate drought-resistant landscaping for a sustainable design. Our detailed guide reveals advanced techniques to optimize your pool’s potential.
Choosing Your Perfect DIY Pool Type
When initiating on a DIY pool project, selecting the ideal pool type requires careful evaluation of your specific constraints and priorities. Your choice will substantially impact both immediate costs and long-term sustainability. Inground pools can significantly boost property value while creating an elegant backyard aesthetic.
From a cost considerations perspective, above-ground pools offer the most budget-friendly entry point with minimal site preparation. With a typical metal frame lifespan of 7-12 years, long-term replacement costs should be factored into the decision. However, if you’re seeking lasting value, examine material comparisons carefully. Vinyl-liner pools provide affordable in-ground options but require periodic liner replacement. Fiberglass pools, while costlier upfront, deliver superior durability and reduced maintenance needs. Modern fiberglass surfaces are smooth and algae-resistant. For maximum design flexibility, concrete pools enable complete customization but demand higher investment and regular upkeep.
Consider your available installation timeline, yard dimensions, and desired longevity. Above-ground and fiberglass options install quickly, while concrete pools require extensive construction time but offer unmatched design versatility.
Essential Planning Steps Before Breaking Ground
Having selected your ideal pool type, proper site planning becomes the foundation for a successful DIY pool installation. Before breaking ground, you’ll need to conduct thorough utility coordination analysis and develop a comprehensive community impact planning strategy to guarantee a smooth construction process. Ensure your pool location is at least 100 feet away from any lakes, ponds, or other water bodies.
Careful site planning and community coordination lay the groundwork for successful DIY pool projects, ensuring smooth execution from start to finish.
Your essential pre-installation checklist should include:
- Complete terrain assessment for slopes, soil composition, and existing structures
- Request professional utility locating services through 811 to identify underground infrastructure
- Secure all required permits, including HOA approvals and municipal clearances
- Design safety features that meet local codes, including fencing and drainage systems
Creating a detailed pool design plan that includes your desired shape, depth, and additional features will help streamline the construction process. A thorough soil analysis should be performed to determine if ground reinforcement will be necessary during installation. Remember to document your site’s sun exposure patterns and evaluate potential environmental impacts. You’ll need to balance aesthetic goals with practical considerations like equipment access routes and neighbor privacy concerns while maintaining strict adherence to local regulations.
Budget-Smart Tips for Pool Construction
When you’re planning your backyard pool, choosing cost-effective materials like vinyl liners or fiberglass can slash your initial investment by 30-50% compared to concrete, while still providing excellent durability and functionality. You’ll optimize your construction budget by opting for straightforward geometric shapes that require less complex engineering and labor, with rectangular designs typically costing $180-250 per square foot versus $250-350 for custom shapes. To further reduce expenses, consider a partial DIY approach where you handle simpler tasks like decking and finishing while leaving technical aspects such as excavation to professionals. According to industry data, vinyl liner pools generally provide the most affordable entry point with costs ranging from 25,000 to 65,000 dollars for a complete installation. Keep in mind that vinyl pools will need pool relining every 7-8 years as part of regular maintenance requirements. In Southern California, homeowners can expect to spend between custom project costs for luxury pool installations with premium features and materials.
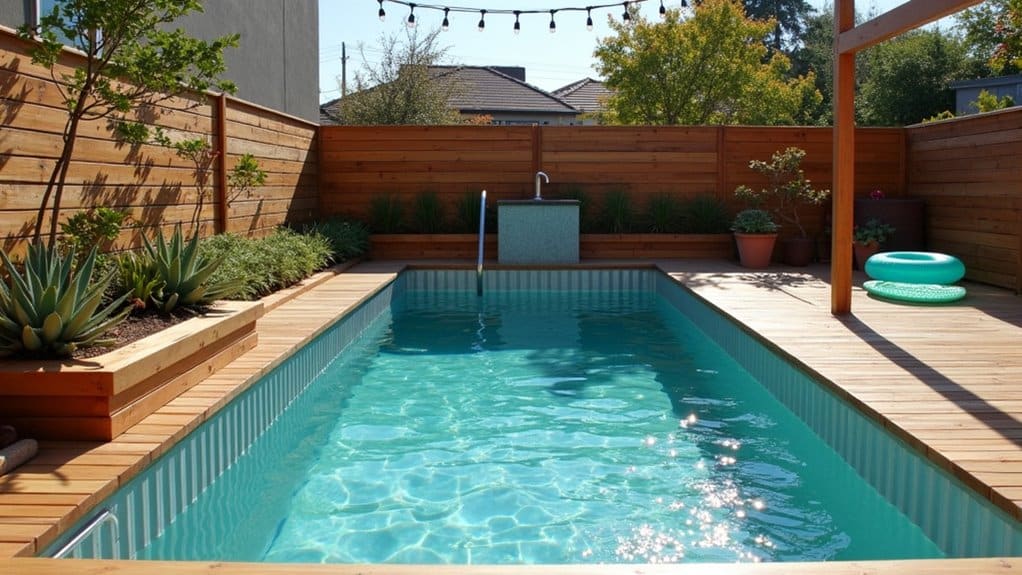
Money-Saving Pool Materials
Building a backyard pool doesn’t have to drain your savings, as several cost-effective material options exist for DIY construction. Vinyl liner systems offer the most budget-friendly entry point, with basic kits starting at $5,000 for smaller installations. You can enhance your pool area with above-ground decking to create an attractive lounging space that matches your aesthetic vision. Cinderblock and epoxy construction provides another affordable DIY option for basic pool builds. Professional installation in high-cost metropolitan areas can add labor expenses of up to $125 per square foot. When selecting materials, consider these cost-effective sealing options and watertight installation techniques:
- Choose polymer wall panels for salt systems to prevent corrosion and extend longevity
- Opt for standard vermiculite base material at $800 instead of premium alternatives
- Select basic concrete decking at $10-15 per square foot versus expensive pavers
- Install manual cleaning systems rather than automatic options
For maximum savings, focus on vinyl liner pools, which offer complete installation for $20,000-40,000, compared to fiberglass shells starting at $30,000. While vinyl requires replacement every 7-10 years, it remains the most economical choice for DIY installations.
Smart Construction Shortcuts
Three key construction shortcuts can dramatically reduce both the time and cost of building your backyard pool. Initially, simplify your foundation by using pier blocks for above-ground structures or level concrete surfaces for DIY pools, enabling flexible foundation adjustments without extensive excavation. This approach streamlines the simplified permitting process since it requires minimal ground disruption. A thorough review of safety regulations before starting construction will help avoid costly modifications later. The compact design of a plunge pool makes it ideal for maximizing limited outdoor spaces while minimizing construction complexity.
Second, opt for pre-fabricated solutions like vinyl or fiberglass shells that eliminate lengthy curing times and complex on-site construction. You’ll save weeks compared to traditional gunite installations. Using galvanized metal brackets for securing frame components ensures long-lasting structural integrity while speeding up assembly. Ultimately, optimize efficiency in waterproofing by using large-format tiles or waterproof concrete render with integrated sealants. These methods reduce installation steps while maintaining structural integrity.
Position your equipment strategically by grouping components and installing plumbing lines during the foundation phase to eliminate separate trenching work later.
Step-by-Step Pool Installation Guide
Start your pool installation by sketching a detailed site layout that accounts for ideal sun exposure, existing landscaping, and required setbacks from property lines. You’ll need to carefully select essential equipment like pumps, filters, and skimmers based on your pool’s volume and intended use, ensuring compatibility with local building codes. Marking underground utilities and planning efficient plumbing routes will streamline your installation process while maximizing energy efficiency and minimizing future maintenance needs.
Planning Your Site Layout
When planning a backyard pool installation, a methodical site layout process forms the cornerstone of your project’s success. You’ll need to evaluate soil composition and select appropriate pool shell materials based on your site’s specific conditions. Start with an extensive property survey to map boundaries and identify underground utilities.
For precise layout planning, follow these essential steps:
- Create a scaled site plan (1 inch = 10 feet) incorporating setbacks and safety requirements
- Mark your pool perimeter with an additional 2-foot over dig allowance
- Square the corners by measuring equal diagonals for geometric accuracy
- Install drainage solutions to manage groundwater pressure and prevent soil erosion
Remember to verify local building codes and obtain necessary permits before breaking ground. Your layout should optimize sun exposure while considering privacy and accessibility from your home.
Choosing Essential Pool Equipment
Selecting the right pool equipment serves as the foundation for a properly functioning aquatic system. You’ll need to invest in essential components that guarantee proper circulation, filtration, and water quality monitoring. Here’s a breakdown of critical equipment categories and their functions:
| Equipment Type | Purpose | Primary Components | Maintenance Need |
|---|---|---|---|
| Filtration | Removes debris | Pump, filter, valves | Weekly cleaning |
| Sanitation | Maintains cleanliness | Chlorinator, chemical feeder | Daily monitoring |
| Testing | Confirms safety | Test strips, water kit | Bi-weekly checks |
| Cleaning | Prevents buildup | Vacuum, brushes, skimmer | Regular use |
For paramount performance, you’ll want to implement proper chemical dosing techniques through automated systems. Don’t forget to include safety equipment like covers and fencing. Keep in mind that sustainable operation depends on regular maintenance of these core components, ultimately protecting your investment while guaranteeing safe swimming conditions.
Safety Features Every Pool Must Have
Installing extensive safety features in your backyard pool isn’t just a legal requirement; it’s a critical investment in preventing accidents and protecting lives. Your design must integrate mandated safety signage and certified pool alarms within a thorough protection system.
Start with these essential safety components:
- Install four-sided isolation fencing with self-closing, self-latching gates positioned above child reach height
- Deploy ASTM F 1346-certified safety covers that completely seal the pool when not in use
- Mount door alarms on all access points and guarantee proper underwater lighting with GFCI protection
- Position life-saving equipment, including rescue hooks and ring buoys, at easily accessible stations
Incorporate non-slip decking materials and maintain clear sightlines throughout the pool area. Remove or secure above-ground pool ladders when the space isn’t supervised, and establish a dedicated water watcher system during active use.
Creative Pool Surroundings and Decor Ideas
You’ll create stunning natural borders around your pool by strategically placing drought-tolerant plants and Japanese yews in lush planter beds, establishing both privacy and eco-conscious aesthetics. Transform your evening poolscape with a combination of floating LED orbs and strategically positioned string lights that cast a warm, inviting glow across the water’s surface. These lighting elements won’t just amplify safety but will also create dynamic reflections off decorative water features, turning your pool area into an enchanting nighttime retreat.
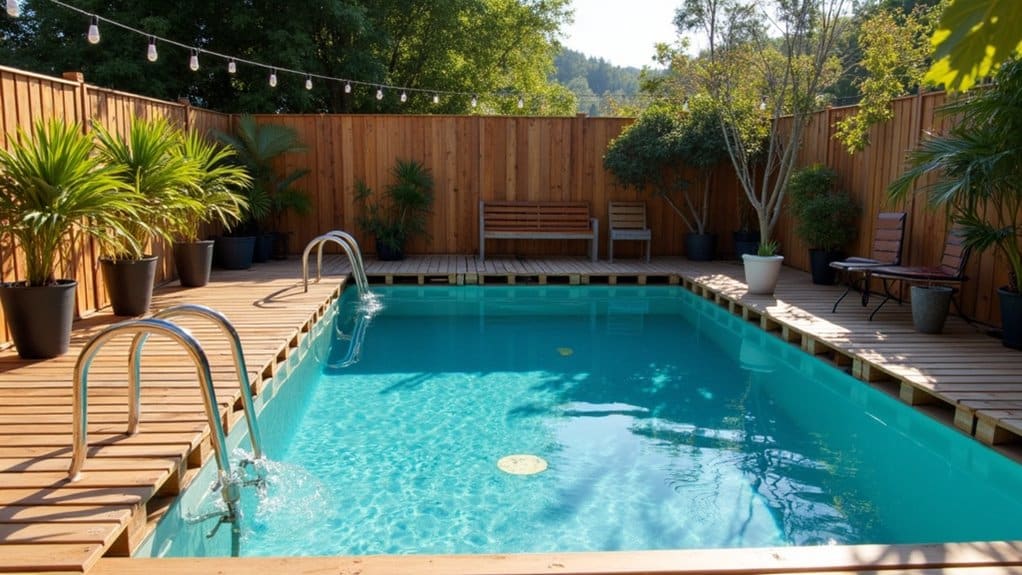
Natural Plant Border Design
When designed thoughtfully, natural plant borders transform a standard pool area into a layered, living scenery that seamlessly integrates water features with the surrounding environment. For low maintenance border upkeep, prioritize drought-tolerant ornamental grasses and resilient evergreens that withstand pool chemicals and intense sun exposure.
Consider these essential seasonal plant selection considerations:
- Mix tall switchgrass with shorter blue fescue for year-round visual interest
- Plant evergreen trees like arborvitae for consistent privacy screening
- Layer tropical species for dramatic foliage in summer months
- Install river stones or white rock borders for improved drainage
Complement your design with large-leafed tropical plants in strategic locations, using heavy containers in high-traffic areas. Remember to select species with non-invasive root systems to protect your pool’s structural integrity while maintaining a sophisticated, sustainable vista design.
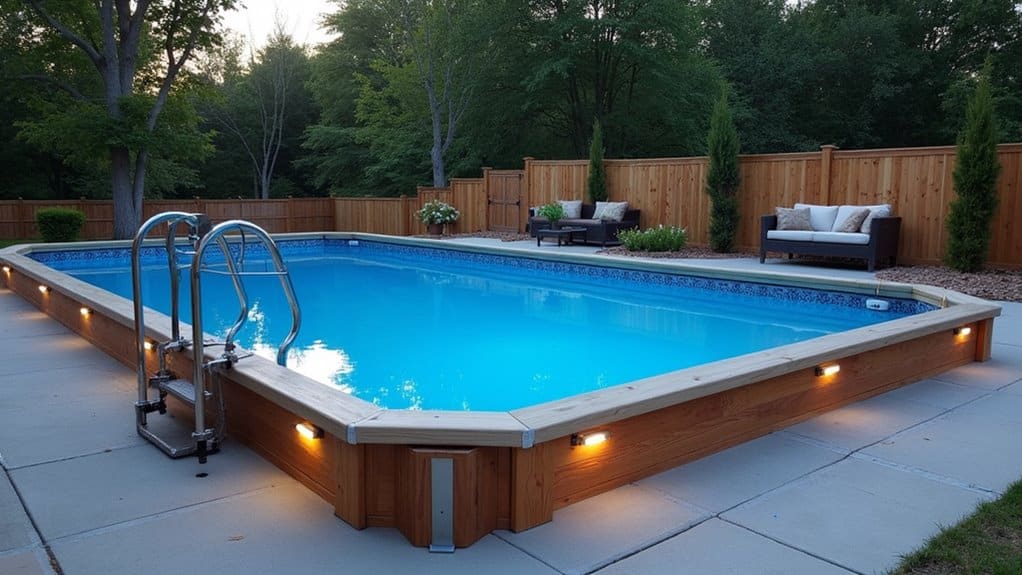
Floating Light Display Ideas
Beyond natural landscaping, thoughtfully curated floating light displays can transform your pool into a mesmerizing nighttime centerpiece. Consider integrating wireless LED balls with customized lighting patterns; these 14″ to 19″ waterproof spheres offer up to 16 color choices and remote-control capabilities through Bluetooth technology.
For eco-conscious design, incorporate biodegradable lanterns with LED candles, creating subtle illumination that’s both sustainable and sophisticated. You’ll achieve ideal floating light coordination by mixing different elements: combine ABS plastic globes with themed vinyl inflatables or paper lanterns, positioning them strategically across your pool’s surface. Improve the display with perimeter rope lighting or projector effects to create depth and dimension. For maximum impact, integrate solar-powered options that eliminate cord management while maintaining consistent illumination throughout your evening gatherings.
Eco-Friendly Pool Design Options
The future of backyard pool design lies in eco-conscious solutions that minimize environmental impact while maximizing sustainability. You’ll find creative options like natural filtration systems that use aquatic plants to purify water and solar-powered pool accessories that greatly reduce energy consumption. These eco-friendly designs aren’t just better for the environment, they’ll save you money long-term.
Consider these sustainable pool features:
- Plant-based regeneration zones covering 50% of your pool area
- Solar panels powering pumps and heating systems, cutting energy costs by 75%
- Saltwater chlorination systems that reduce chemical usage
- Rainwater harvesting setups for pool filling and maintenance
Smart Maintenance Strategies for Longevity
Maintaining a pristine backyard pool requires smart, systematic care that bolsters both longevity and water quality. You’ll need to establish a weekly routine that includes skimming, brushing, and vacuuming to prevent debris accumulation and algae growth. Run your pump 8-12 hours daily to guarantee proper chemical distribution and water clarity.
Focus on chemical maintenance by testing pH and chlorine levels twice weekly, keeping pH between 7.2-7.6. During seasonal shifts, adjust your maintenance schedule, increase chlorine during hot months and implement thorough pre-season cleaning. Install an automatic cleaner to reduce manual labor, and wrap pantyhose around skimmer baskets for amplified filtration. Don’t forget monthly equipment inspections to catch potential issues early, and use pool covers during downtime to safeguard water quality and minimize cleaning demands.
Fun Pool Additions and Entertainment Features
Creating an engaging poolside environment requires thoughtful integration of entertainment features that transform your backyard sanctuary into a multifunctional outdoor living space. Luxury water features like cascading waterfalls and LED-illuminated fountains establish a resort-like atmosphere while augmented pool heating options extend your swimming season.
For maximum entertainment value, consider these strategic inclusions:
- Install a swim-up bar with underwater seating and integrated storage
- Implement weatherproof audio-visual systems for outdoor movie nights
- Add fire bowls and LED lighting for dramatic evening ambiance
- Incorporate a Baja shelf with loungers for comfortable socializing
Complete your design with a smart-controlled sound system and weatherproof speakers positioned strategically around the pool area. Consider energy-efficient heating solutions and sustainable materials for features like conversation pits and shade structures to minimize environmental impact while maximizing enjoyment.
Year-Round Pool Care and Protection
While luxurious pool features bolster enjoyment, proper year-round maintenance guarantees your investment stays pristine and functional through every season. You’ll need to establish a consistent schedule of chemical testing procedures, monitoring pH levels between 7.2-7.8 and maintaining proper sanitizer concentrations throughout the year. Adjust your maintenance frequency based on seasonal demands, increase water testing during summer heat and after heavy use, while preparing for autumn leaf management with appropriate covers.
When winter approaches, focus on winterizing equipment by draining systems, adding antifreeze where needed, and installing a secure winter cover. Don’t forget to inspect structural elements annually, including the shell, tiles, and deck surfaces. Regular equipment checks of filters, pumps, and heaters will prevent costly repairs and certify your pool remains a reliable centerpiece of outdoor living.
Frequently Asked Questions
Can I Install a DIY Pool if My Yard Has a Slight Slope?
Yes, you can install a DIY pool on a slight inclination, but you’ll need to adjust pool design and carefully balance the ground initially. Start by measuring the slope’s grade and consulting a landscaper to determine the best leveling approach. You’ll want to excavate and compact the soil properly, then add a layer of sand or crushed limestone for stability. Consider using retaining walls if needed to prevent erosion and guarantee long-term structural integrity.
What Happens if My DIY Pool Develops a Leak After Installation?
If your DIY pool develops a leak, you’ll need to act quickly to prevent water damage and structural issues. Start with basic detection methods like the bucket test and dye testing to identify the leak’s general location. While you can attempt minor repairs, it’s best to consult professional for repairs, especially for complex issues involving plumbing or structural damage. They’ll determine if you need a pool liner replacement or more extensive fixes to guarantee long-term durability.
How Do I Prevent Mosquitoes From Breeding in My Backyard Pool?
You’ll need to take a multi-layered approach to prevent mosquito breeding. Start by regularly cleaning your pool’s surface and maintaining proper chlorination levels. Use a non-toxic larvicide like Bti to safely eliminate any larvae without harming swimmers. Keep your pool filter running daily to prevent water stagnation, and don’t forget to shock the pool weekly during peak season. Install outdoor fans around your pool area, as mosquitoes can’t navigate through strong air currents.
Can I Convert My DIY Pool Into a Hot Tub?
Yes, you can convert your DIY pool into a hot tub with proper planning and modifications. You’ll need to focus on three key areas: insulation, heating, and circulation. Start by installing foam board insulation around your pool’s walls, then add an electric heater and efficient pump system. Don’t forget to maintain proper water chemistry and use a thermal cover to retain heat. Regular maintenance of your converted hot tub will guarantee long-term enjoyment and energy efficiency.
What’s the Best Way to Hide Pool Equipment From View?
You’ll find several effective options for camouflaging equipment while guaranteeing easy access. Install a vinyl or metal shed for maximum protection and storage, or opt for purpose-built equipment boxes if you’re seeking a budget-friendly solution. For a natural approach, create hiding enclosures using weather-resistant privacy screens combined with strategic landscaping. Consider sustainable materials like recycled vinyl, and verify proper ventilation around your equipment while maintaining aesthetic appeal through coordinated design elements.