Gel Coat Patch Repairs for Spider Cracks and Surface Imperfections
When spider cracks appear across your fiberglass pool’s surface, gel coat patch repairs offer a reliable fix that restores both appearance and protection. You’ll first need to assess whether damage penetrates beyond the gel coat by light sanding, deeper cracks require fiberglass reinforcement.
Start your stress fracture mitigation by draining below the damaged area and cleaning with pool-safe cleaner. Sand with coarse grit to create adhesion, then degrease with acetone or MEK. For high humidity environment repair, proper surface preparation prevents moisture entrapment.
Apply matching gel coat using specialized kits with resin and hardener. Following manufacturer’s instructions for mixing ensures the repair achieves a seamless blend with your existing pool surface. Once cured, wet sand progressively from 400 to 1500-grit. Polish with a dual-action polisher using overlapping motions. Expect patches to last six months to two years with proper application. A well-executed gel coat repair can help extend your pool’s lifespan of 25, 50 years by preventing water intrusion and structural weakening. Attempting major repairs without proper knowledge can lead to further damage, so evaluate whether your spider cracks require professional expertise before proceeding.
Professional Full Pool Resurfacing With Uv-Resistant Gel Coat
Professional full pool resurfacing becomes necessary once gel coat deterioration spreads beyond isolated patches, typically after 15-25 years of pool use.
When gel coat damage spreads beyond simple spot repairs, full resurfacing is your pool’s path back to pristine condition.
Surface Preparation and Primer Application
You’ll start by sanding the entire pool surface with coarse-grit sandpaper, using an orbital sander for large areas and hand-sanding tight spots. This sanding process creates an even base, ensuring the new gel coat bonds seamlessly. After masking surrounding areas with flame-resistant cloth, apply 100% marine epoxy primer when temperatures range 65°F-85°F with humidity below 50%. Allow 24-48 hours for curing. Using variable speed control on your orbital sander helps achieve the optimal finish during preparation.
UV-Resistant Gel Coat Application
Mix UV-resistant gelcoat like AQUA-GLASS™ with 1-2% MEKP catalyst by weight. Spray using 6-8 inch patterns with 50% overlap, maintaining 8-12 inches distance to achieve 15-20 mils thickness. Cost considerations include professional labor and materials, while project timelines typically span 3-5 days including cure time. Alternatively, ecoFINISH thermo-polymer coatings offer superior resistance to UV rays, chemicals, and staining while being completed in just one day.
Wall-Floor Junction Reinforcement for High-Pressure Areas
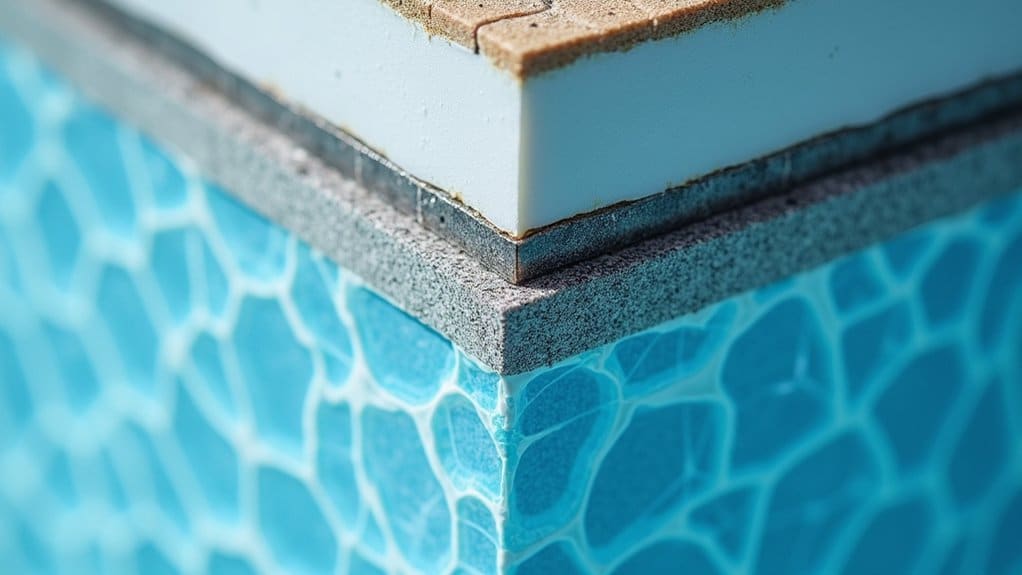
Because wall-floor junctions endure the highest concentrated forces in fiberglass pools, often exceeding 1,200 PSI, you’ll need to address these critical stress points before structural failure occurs. Hydrostatic pressure peaks at these junction points, creating diagonal crack vulnerabilities that demand immediate concentrated pressure mitigation.
Effective junction bonding techniques require a systematic approach:
- Apply polyester resin with fiberglass reinforcement to prepared surfaces at wall-floor connections
- Install groundwater access pipes to relieve hydrostatic pressure at vulnerable junctions
- Seal around fittings like drains and returns using resin coating to eliminate structural discontinuities
You’ll achieve ideal results by equalizing pressure through simultaneous water filling and gravel backfill application. Compression strips with silicone-impregnated gaskets create watertight seals when secured with stainless steel skirts. Similar to how a compacted gravel bed provides stable foundation support during initial pool installation, proper junction reinforcement distributes concentrated forces across a wider surface area. Before installing reinforced coping and paving around repaired junctions, applying waterproof membrane over the concrete surrounds prevents moisture infiltration that could compromise the structural repair. For questions about specific repair applications or material recommendations, you can reach professionals at info@fowlerpools.com to discuss your junction reinforcement project.
Blister Repair and Prevention Techniques
While wall-floor junctions face concentrated structural forces, gel coat surfaces confront a different threat: osmotic blistering that compromises your pool’s protective outer layer.
Water penetrates gel coat through osmosis, becoming trapped between layers. High pH and warm temperatures accelerate this process, causing delamination as moisture expands beneath the surface. Constant UV exposure can also break down gel coat chemicals, causing fading and brittleness that makes the surface more susceptible to blistering. When water contacts glass fibers beneath the gelcoat, a chemical reaction produces gas that exerts outward force, forming the characteristic blisters.
Material selection determines repair longevity. You’ll need epoxy-based putty for void filling, fiberglass resin with hardener for structural damage, and color-matched gel coat for finishing. Sand damaged areas with 60-grit until you reach solid laminate, then apply repairs in layers.
Repair process optimization requires proper surface preparation, clean with acetone, feather edges smooth, and cure completely before final 220-grit sanding. For prevention, vinyl ester resin barriers block water penetration effectively during manufacturing or retrofit applications.
Crazing Treatment Within the Critical 48-Hour Window
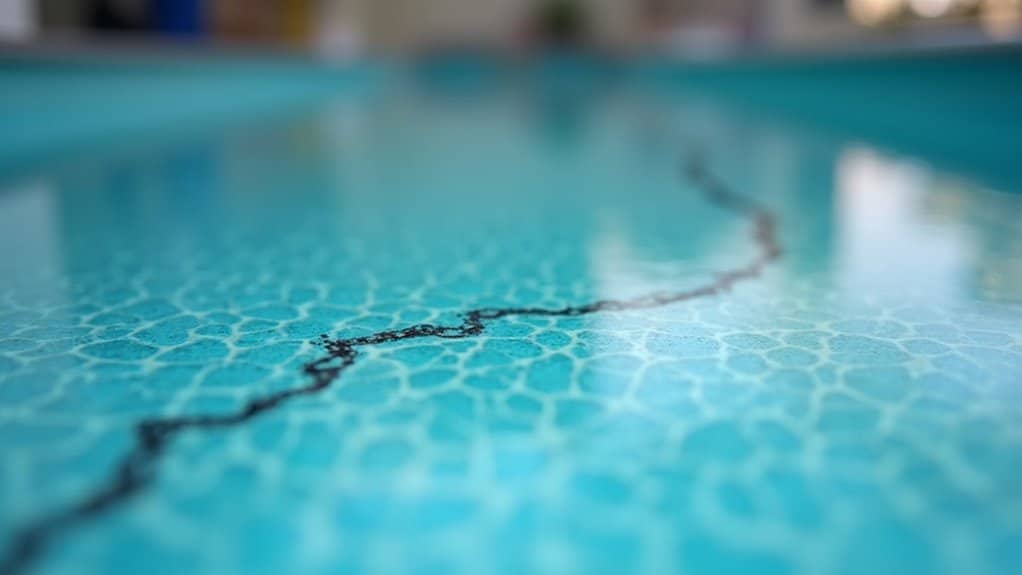
Crazing appears as fine spider-web cracks across your pool’s gel coat surface, signaling damage that demands immediate attention before it worsens. These hairline fissures remain confined to the gelcoat layer, but neglecting them during the critical 48-hour window compromises your repair’s longevity. Left untreated, even these small cracks can compromise structural integrity over time, making prompt action essential. Common causes include improper shipping, manufacturing, or installation, so identifying the source helps prevent future occurrences.
Your treatment protocol requires three essential steps:
- Surface preparation, Drain below the damage, sand with coarse grit, then complete degreasing solvent use with acetone or MEK followed by tack cloth application.
- Catalyst application, Mix marine-grade bond coat at a precise 4:1 base-to-catalyst ratio, ensuring fresh catalyst for consistent hardening without soft spots.
- Reinforcement, Apply polyester putty matching your pool’s thermal expansion properties, then layer fiberglass cloth for structural integrity.
You’ll achieve ideal adhesion when you work within this narrow curing window. Since most gelcoat issues can be successfully repaired, addressing crazing promptly ensures your pool maintains both its appearance and performance for years to come.
Structural Crack Repair Using Flexible Filler Compounds
Structural cracks demand more aggressive intervention than surface-level crazing, and flexible filler compounds have become the go-to solution for repairs that must withstand your pool’s constant expansion and contraction cycles.
Flexible filler compounds are essential for structural crack repairs because they move with your pool instead of against it.
Your crack filler product selection matters enormously. Choose epoxy repair kits rated for minor to moderate fiberglass damage, ensuring the formula accommodates pool flex without re-cracking. Standard rigid fillers fail because they can’t handle thermal movement. Carbon fiber crack repair offers a superior strength-to-weight ratio that provides robust reinforcement while remaining versatile enough for fiberglass pool surfaces.
For crack filler application methods, start by thoroughly cleaning the damaged area. Apply the flexible compound according to manufacturer specifications, allowing proper cure time before proceeding. This approach restores both protective function and appearance.
DIY repairs work for hairline cracks that haven’t penetrated beyond the gelcoat layer. Deeper structural damage requires professional assessment to prevent water leakage and foundation undermining. For severe structural cracks, Torque Lock Structural Staples offer a superior alternative with their controlled compression design that locks cracks together securely and prevents further propagation.
Color-Matched Gel Coat Restoration for Faded Surfaces
Once you’ve addressed structural cracks, faded and worn gelcoat surfaces present your next restoration challenge, one that affects both aesthetics and long-term pool protection.
Successful restoration requires methodical execution:
- Surface preparation: Sand the entire area with coarse-grit paper, then degrease with acetone and remove residual dust with a tack cloth.
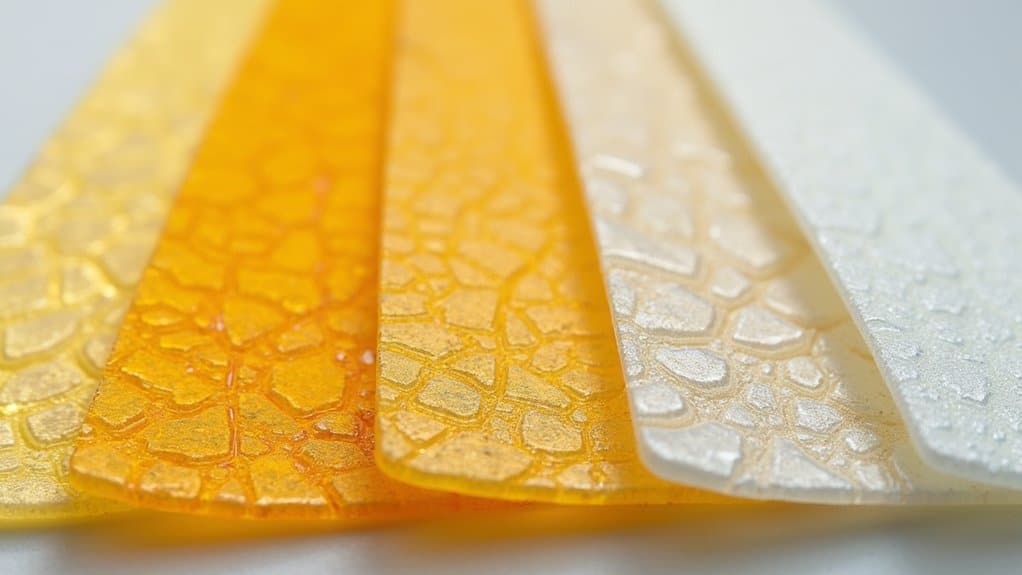
- Customized color mixing techniques: Select UV-stable pigments matched to your pool’s original shade, using pool-specific products like AQUA-GLASS™ for chemical resistance.
- UV resistant topcoat application: Spray gelcoat in 6-8 inch patterns with 50% overlap, maintaining 8-12 inches from the surface. Work within the 15-20 minute window at 70°F.
After 24-48 hours of curing, wet sand progressively from 400 to 1500-grit, then polish with a dual-action polisher for even gloss and smooth texture.
Osmotic Blister Drainage and Barrier Coating Application
When you spot osmotic blisters on your fiberglass pool, you’ll need to drain the water completely and identify affected areas immediately, blisters deflate quickly once exposed to air, making them harder to locate. For gel coat blisters, sand with 60-grit extending 20-40mm beyond the damage, while interlaminate blisters require an angle grinder with #40-60 grit to cut 25-30mm beyond at 5mm depth until you reach bonded polyester fiberglass. After grinding, cleaning with acetone, and allowing surfaces to dry thoroughly, you’ll apply barrier coating over fairing compounds to address the osmotic pressure that caused the bubbling in the first place.
Blister Drainage Techniques
Several proven techniques exist for draining osmotic blisters before you can apply a protective barrier coating. You’ll need to release trapped moisture completely, or the problem will recur beneath your new finish.
Effective drainage methods include:
- Vacuum extraction techniques, You pierce each blister, then apply suction to draw out the concentrated solution trapped beneath the gelcoat.
- Grinding and drying, You remove damaged gelcoat entirely, exposing the laminate to air circulation for thorough moisture evaporation.
- Heat-assisted drying, You use controlled heat lamps to accelerate moisture release from the fiberglass layers.
Following proper blister prevention procedures means you’ll allow adequate drying time, often several weeks, before applying vinyl ester barrier coats. Rushing this step guarantees failure.
Barrier Coating Application
After your fiberglass pool has dried completely, typically two to four weeks depending on climate conditions, you’re ready to apply the barrier coating that’ll prevent future osmotic blistering.
Thorough surface preparation determines coating success. Clean the surface with acetone or MEK, working in sections while changing rags frequently to avoid recontamination. Finish with tack cloth for final particle removal.
For proper application techniques, spray gelcoat using an HVLP gun with a 6-8 inch pattern, maintaining 50% overlap at 8-12 inches from the surface. Target 15-20 mil thickness, verified with a wet film gauge. Keep wet edges by working methodically in sections.
Allow 24-48 hours for primer cure before gelcoat application. Test readiness by sanding, properly cured material produces fine powder without sticking.
Fiberglass Mat Layering for Compromised Shell Sections
Before you can achieve a lasting repair on a compromised pool shell, you’ll need to execute proper mat layering that restores structural integrity without creating weak points.
Effective mat integration techniques require precision at every step. Start by cutting two pieces of 300g fiberglass mat, one smaller for the innermost layer. Apply your catalyzed polyester resin, then place the mat while the surface remains damp.
Follow these structural stabilization methods for ideal results:
- Wet out each layer two to three times using a roller
- Remove air bubbles immediately with a bubble roller after saturating the laminate
- Position the larger mat outermost to minimize visible stepping
Sand any humps flat before layering to prevent future cracking and delamination.
Preventive Maintenance Sealing to Extend Repair Longevity
How effectively your fiberglass repair holds up depends largely on the preventive maintenance sealing you apply afterward. Your resin application techniques directly impact long-term durability. Start with polyester resin primer soaked into the surface, then apply a thinned first coat using 10-15% acetone. Your second layer should include wax additive for waterproof protection.
| Sealing Factor | Performance Impact |
|---|---|
| UV-resistant coating | Prevents chalking and cracking |
| Chemical-resistant sealant | Withstands chlorine erosion |
Coating performance measurements show polyFIBRO-type sealants bond permanently, eliminating delamination cycles. You’ll avoid repeated acid washing that weakens surfaces over time. Maintain pH between 7.2-7.8 and balanced chlorine levels to protect your sealed repair. These preventive steps extend gelcoat life decades beyond temporary fixes.
Frequently Asked Questions
How Long Do Fiberglass Pool Repairs Typically Last Before Needing Attention Again?
Your fiberglass pool repairs typically last 20, 30 years before needing attention again, greatly outperforming concrete’s 10, 15 year cycle. Repair longevity factors include installation quality, manufacturing standards, and environmental conditions, all determining whether you’ll hit the 25 or 50-year mark. Maintenance considerations matter equally: you’ll extend repair durability by maintaining proper water chemistry and consistent upkeep routines. With quality gelcoat refinishing, you can add another 7, 13 years of reliable performance.
Can I Perform Basic Fiberglass Pool Repairs Myself or Hire Professionals?
You can handle basic fiberglass pool repairs yourself, but professional repair considerations come into play for structural or extensive damage. DIY repair feasibility works well for cosmetic issues like minor blistering, fading, or surface touch-ups using basic repair kits. You’ll need to follow manufacturer instructions precisely and address surface crazing within 48 hours. However, you should hire professionals for gel coat resurfacing, structural concerns, or anything requiring specialized equipment to guarantee long-term durability.
How Does Saltwater Affect Fiberglass Pool Repair Durability Over Time?
Saltwater won’t compromise your fiberglass pool repairs when you maintain proper conditions. You’ll find that saltwater concentration levels between 2700, 3400 ppm actually prove gentler on repaired surfaces than traditional chlorine. Over extended saltwater exposure duration, repairs hold up well because fiberglass’s non-porous gel coat resists chemical penetration. You should monitor calcium hardness below 120 ppm and clean salt cells every 3, 6 months to maximize your repair longevity.
What Soil Ph Levels Can Damage Fiberglass Pools Requiring Future Repairs?
Soil acidity levels below 5.5 or above 8.5 can damage your fiberglass pool’s exterior shell, eventually requiring repairs. Highly acidic soils corrode the structural layers, while alkaline soil composition factors promote mineral deposits that stress the gelcoat. You’ll want to test your backfill area before installation and consider adding a protective barrier if conditions fall outside neutral ranges. Addressing problematic soil early prevents costly structural repairs down the road.
How Do Fiberglass Repair Costs Compare to Vinyl or Concrete Pool Repairs?
You’ll find fiberglass pools offer the most favorable repair cost comparison among all pool types. While vinyl liners require $4,000-$6,000 replacements every 5-10 years and concrete demands $8,000-$15,000 resurfacing every 7-15 years, fiberglass repairs remain minimal and rare. For repair budget planning, expect fiberglass maintenance around $4,000 over ten years versus vinyl’s $12,000-$17,500. This significant difference makes fiberglass the most cost-effective long-term investment for your repair expenses.