


Building a DIY pool deck requires careful planning and adherence to local building codes. You’ll need to obtain necessary permits, select moisture-resistant materials, and prepare your site by clearing debris and marking utility lines. Install a solid foundation with concrete footings below the frost line, construct a sturdy frame with proper supports, lay decking boards, and add safety features like railings. Following these seven essential steps will guide you through your pool deck transformation.
Planning and Obtaining Building Permits
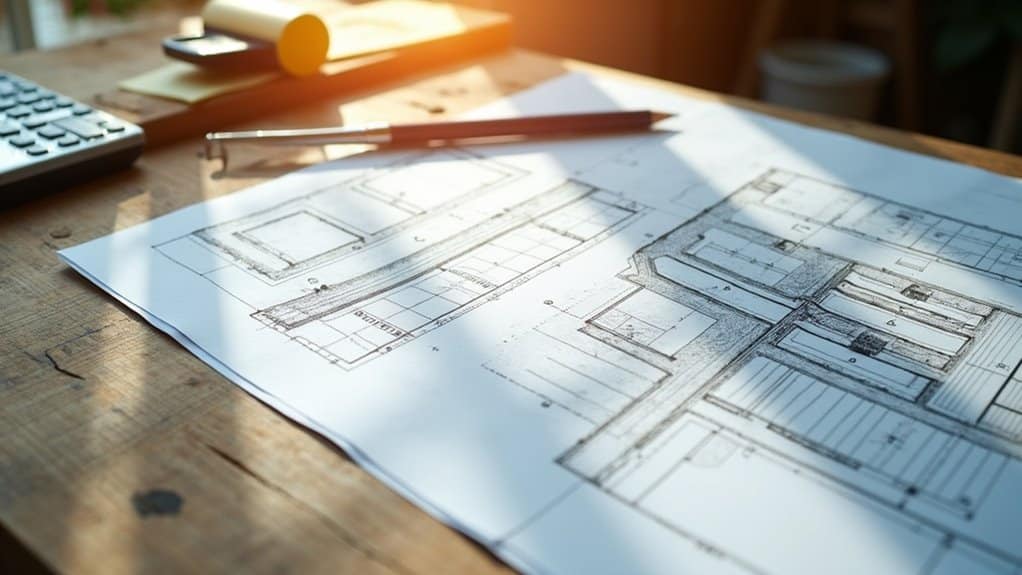
Before breaking ground on your pool deck project, you’ll need to navigate the essential process of obtaining proper building permits. Contact your local building department to learn specific requirements, as most jurisdictions require permits for decks over 30 inches high or exceeding 120-200 square feet. Licensed contractors typically handle permit applications and inspections when hired for the job.
Building to code represents the minimum standard for safety and structural integrity, not necessarily the optimal design for your pool deck. Submit two sets of detailed construction plans showing dimensions, framing details, and a site plan while complying with zoning restrictions. You’ll need to pay permit fees ranging from $75-$500+ depending on your location. When negotiating the permit review process, expect officials to evaluate structural safety, load-bearing calculations, and code compliance. The review can take several days to a month. Having no permit could lead to forced demolition of your pool deck if discovered by city inspectors.
Selecting Materials and Tools
Selecting the right materials and tools for your pool deck project is fundamental for long-term safety and durability. Your deck design considerations should account for moisture resistance and slip prevention, making material selection indispensable. Including equipment access points is essential for maintaining pool pumps and filters. Pressure-treated wood options can reduce initial costs but require extensive maintenance over time. Setting posts requires digging holes and allowing concrete to cure for optimal strength.
| Material Type | Best Choice for Pool Decks |
|---|---|
| Foundation | Concrete piers with rebar |
| Framing | 6×6 posts for stability |
| Decking | Composite or PVC materials |
| Hardware | Stainless steel fasteners |
You’ll need essential tools like a miter saw for precise cuts, a powerful drill for securing components, and a reliable level for accurate installation. When deck materials sourcing, choose suppliers who specialize in pool-grade products. Prioritize materials rated for pool environments, as they’ll resist water damage and chlorine exposure better than standard options. Don’t forget safety equipment, including non-slip surface treatments and proper railings.
Preparing the Construction Site
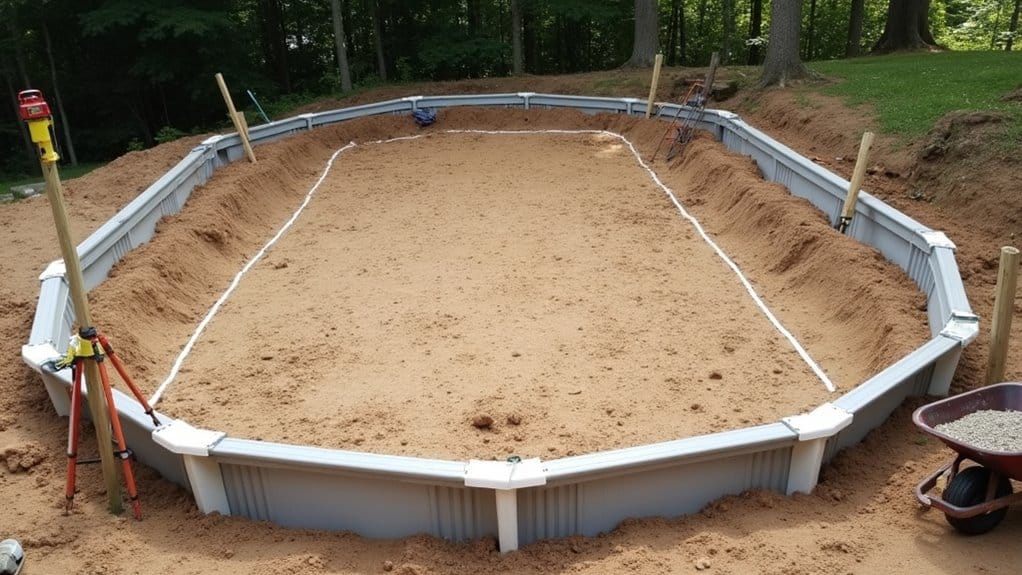
Once you’ve finalized your deck design, proper site preparation becomes essential for ensuring a stable and code-compliant pool deck. Before breaking ground, coordinate with utility companies to mark underground lines and arrange for excavation waste disposal. Your site preparation should follow these critical steps:
- Clear the construction area completely by removing all vegetation, debris, and existing structures that could interfere with your work, creating a clean workspace around the pool perimeter. Cross-bracing between support posts will provide crucial structural stability during and after construction.
- Level and grade the ground using appropriate tools, paying special attention to identifying high spots that need excavation and low areas requiring fill material. Selecting composite decking material for your project will provide enhanced durability against moisture and weather conditions during the construction phase and beyond. Perform thorough ground reinforcement to prevent settling and maintain structural integrity over time.
- Reinforce the foundation by adding gravel layers or concrete supports in areas with soft soil, ensuring long-term stability.
- Mark footing locations and property boundaries accurately, adhering to local setback requirements and building codes for proper structural placement.
Building the Deck Foundation
A solid foundation serves as the pivotal backbone of your pool deck project, determining its long-term stability and safety. You’ll need to choose between concrete footings, deck piers, or deck blocks based on your soil conditions and local frost line requirements. Utility location checks are essential before starting any digging to avoid damaging underground lines.
For permanent installations, dig footing holes below the frost line and add a 6-inch layer of compacted gravel. Set your concrete forms, guaranteeing they’re level, then pour your concrete mixture. The concrete mixture quality is essential, use structural-strength concrete like QUIKRETE 5000 for ideal durability. Place anchor bolts in the wet concrete for post attachment. Following proper ledger beam installation is crucial for connecting the deck to your home’s structure.
For a faster option, you can install pier blocks in precise rows, spacing them 24 inches center-to-center. Using Dek-Block precast piers can significantly streamline the installation process. Strict adherence to installation plans ensures proper load distribution and structural integrity.
Installing the Frame and Support Structure
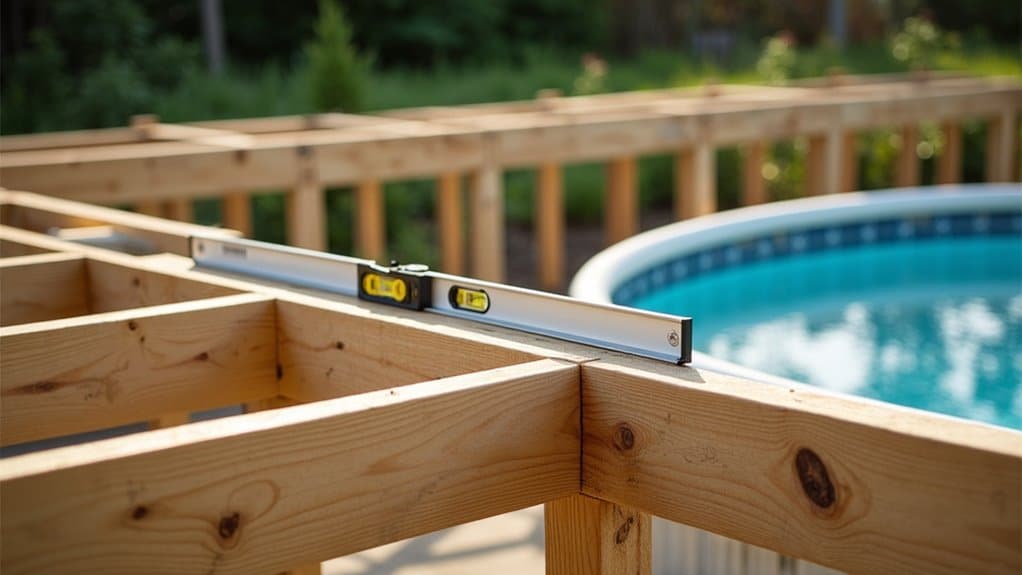
You’ll need to carefully mark your post locations around the pool’s perimeter, maintaining consistent spacing and square angles for proper weight distribution. Post plumbing is critical to ensure stability and safety of the structure. Joist hangers allow you to securely attach horizontal support beams to the vertical posts. Measure and double-check all support points to verify they align with your approved deck plans, paying special attention to the critical connections where posts will meet rim joists. Once your layout is confirmed, secure each foundation connection using code-compliant hardware and fasteners rated for exterior use in pool environments. Using Tuff Blocks as foundation supports provides a durable, lightweight alternative to traditional concrete footings.
Post Layout
Before beginning construction of your pool deck frame, the accurate placement of support posts creates the foundation for a sturdy and level structure. When positioning posts on terrain, you’ll need precise measurements and proper tools to guarantee optimal stability and load distribution.
- Start by installing treated lumber posts or concrete pier blocks at each corner, ensuring they’re plumb using a speed square and temporary bracing for stability
- Space intermediate posts according to your deck plans, typically aligning them with beam splices for proper load transfer
- Focus on adjusting post heights to match the pool edge elevation, keeping in mind you can trim excess material after assembly
- Secure posts using appropriate structural hardware and galvanized fasteners, pre-drilling holes to prevent splitting while maintaining structural integrity
Measure Support Points
Installing the frame and support structure begins with precise measurements of your support points. You’ll need to carefully measure and mark the frame perimeter relative to your pool and existing posts, ensuring consistent height measurements throughout. Reference your deck plans to determine beam and joist positions, then use chalk or string lines to mark their locations.
Position your rim joists at pool height to create a level walking surface, and verify that spacing between support posts meets local building codes. Double-check all distances to account for material thickness and pool diameter. For precise angle calculations, use temporary clamps or braces to hold components in place while you confirm measurements. Don’t forget to pre-drill holes for fasteners to improve accuracy and prevent wood splitting during the installation process.
Secure Foundation Connections
Now that support points are marked, securing the frame-to-post connections demands precise hardware selection and careful assembly. Use concrete pier blocks or in-ground footings for proper anchoring methods, ensuring treated 4×4 posts are level before proceeding with frame attachment.
- Pre-drill holes with a 7/32″ bit to prevent splitting, then secure rim joists to posts using structural screws or TimberLok fasteners designed for treated lumber
- Install joist hangers at connection points where posts aren’t directly present, filling all designated holes with appropriate hardware
- Add hurricane ties at critical connections using hot-dipped galvanized nails for maximum hardware corrosion protection
- Reinforce corners with diagonal bracing, cutting 45-degree angles on 2×4 or 2×6 boards and securing with 1/2″ lag screws and washers
Always verify local building codes for approved connection methods and hardware requirements.
Laying and Securing Deck Boards
When installing your deck boards, maintain consistent 1/8″ to 1/4″ spacing between boards and a 1/8″ gap against the fascia to guarantee proper drainage and allow for expansion. You’ll need to decide between exposed deck screws (pre-drilled 1″ from board edges) or hidden fastener systems like Trex Hideaway® for a cleaner appearance. Start with perimeter boards around the pool edge, cutting and fitting them precisely to the pool’s curve, then work your way outward using spacers to maintain uniform gaps and alignment.
Board Spacing and Gaps
Proper board spacing stands out as one of the most pivotal aspects of deck construction. This essential detail affects both your deck’s longevity and safety, accounting for moisture expansion and thermal expansion of materials.
Follow these critical spacing guidelines for your pool deck:
- For seasoned lumber, maintain gaps between 1/8″ to 1/4″, with 3/16″ being ideal (use a 16D nail as a simple spacing guide)
- Install wet lumber boards tightly together, as they’ll naturally create proper gaps when drying
- For composite decking, strictly follow manufacturer’s specifications, as these materials are more sensitive to temperature changes
- Never exceed 3/8″ gaps between boards, as wider spacing creates safety hazards and doesn’t meet code requirements
Use deck spacers at each joist intersection to guarantee consistent, uniform gaps throughout your installation.
Hidden Vs Exposed Fasteners
After establishing the correct board spacing, your next major decision involves choosing between hidden and exposed fasteners for securing your deck boards. Your choice impacts both aesthetics and functionality of your pool deck.
Hidden fasteners create a seamless appearance and reduce moisture penetration but require a higher upfront cost and longer installation time. They’re ideal if you’re prioritizing a clean look and don’t mind the additional fastener cost analysis showing a 15-30% surge in materials. However, they’ll complicate future maintenance requirements.
Exposed deck screws offer maximum holding strength and easier repairs at a lower expense. While they remain visible and can create potential snag points, they’re universally compatible with all decking materials and allow for simpler board replacement. Consider your budget, desired appearance, and long-term maintenance plans when making this critical decision.
Perimeter Board Installation
Since perimeter boards create the critical shift between your pool and deck surface, installing them demands scrupulous attention to detail. Consider your board type carefully, as PVC, composite, and wood materials each respond differently to weather exposure and pool chemicals.
Follow these critical installation steps:
- Mark your layout using chalk lines and maintain a consistent 1/8″ gap between boards and fascia for proper drainage and thermal expansion
- Pre-drill board ends to prevent splitting, and space fasteners every 16 inches, positioning them 1″ from edges
- Use color-matched fasteners and plugs, ensuring boards are pulled snugly against joists to minimize movement
- Leave 1/4″ gaps around posts and verify alignment along the entire perimeter before final securing, check that edge boards have slip-resistant textures for pool safety
Adding Safety Features and Final Touches
Safety features transform your DIY pool deck from an initial structure into a secure entertainment area that meets code requirements and protects your family. Install a self-closing, self-latching gate within your four-foot fence barrier, and mount deck lighting with GFCI protection for nighttime safety. Apply non-slip coatings to your decking and stairs, focusing on high-traffic areas and spots prone to getting wet.
Mount handrails securely, and install anti-entrapment drain covers that meet federal standards. Position emergency equipment, including a primary aid kit and pool rules signage, in visible locations. Don’t forget to integrate a pool alarm system for added security. Schedule ongoing maintenance inspections to check structural integrity, and replace worn customized safety accessories like HandiTreads or non-slip materials when needed. Keep the deck surface clean and free of hazards.
Frequently Asked Questions
How Long Does It Typically Take to Complete a DIY Pool Deck?
You’ll need about 2-7 days for a basic above-ground pool deck construction timeframe if you’re experienced with DIY projects. However, plan for 2-3 weeks if you’re new to deck building or handling a more complex design. Keep in mind that deck maintenance requirements start immediately after completion, so factor in time for sealing and waterproofing. Always follow local building codes and obtain necessary permits before starting your project to guarantee safety compliance.
Can Pool Chemicals Damage or Discolor My Deck Materials Over Time?
Yes, pool chemicals can greatly impact your deck material lifespan. Chlorine and bromine will cause gradual deterioration through regular chemical exposure, leading to fading, discoloration, and potential structural damage. You’ll notice these effects more on wood and porous materials, though composite decking isn’t immune. To protect your investment, you should regularly rinse your deck after pool use and apply appropriate sealers designed for pool-adjacent surfaces.
Should I Install Lighting Fixtures During or After Deck Construction?
You’ll want to install lighting fixtures during deck construction, not after. Early wiring placement lets you properly conceal and protect cables within the framing, while ensuring code-compliant installation depths and weatherproof connections. Lighting integration is considerably more challenging after completion, often requiring disruptive modifications to existing structures. By planning and installing lights during construction, you’ll achieve better aesthetics and avoid costly retrofits down the line.
What’s the Average Cost Difference Between Wood and Composite Pool Decking?
You’ll find composite pool decking costs nearly double compared to wood initially, around $30-45 per square foot installed versus wood’s $15-25. However, when you factor in material durability and weather resistance, the long-term costs favor composite. While you’ll spend about $400-450 annually maintaining wood decking, composite requires minimal upkeep. Over a 25-year lifespan, composite’s higher upfront cost is often offset by its lower maintenance requirements and longer durability.
Can I Build a Pool Deck Directly on Existing Concrete Pavers?
Yes, you can build over existing concrete pavers, but you’ll need to guarantee proper substrate stability initially. Don’t attach decking directly to the pavers, instead, install pressure-treated sleepers as a framework. You’ll also need to ponder drainage requirements to avert water pooling and potential damage. Before commencing, verify your pavers are level, structurally sound, and free of settling issues. Always check local building codes for specific requirements.