To paint a fiberglass pool, you’ll need to drain it properly, clean with TSP solution, and sand the gelcoat using 50-80 grit progressing to 400-800 grit for guaranteed adhesion. Epoxy paints like AquaGuard 5000 or Poxolon 2 work best, offering 5-8 year lifespans and resistance to chemicals, saltwater, and osmotic blistering. Apply two coats in overlapping strokes, allowing 5-7 days cure time before refilling. The detailed preparation steps below will confirm your finish lasts.
Draining and Preparing Your Fiberglass Pool Surface
Before you drain a single gallon from your fiberglass pool, you’ll need to check local regulations governing water discharge and assess your property’s groundwater conditions. A thorough water table assessment prevents hydrostatic pressure from lifting or cracking your pool shell during the draining process.
Shut down all electrical equipment, pump, heater, filter, and chlorinator, before beginning. Position a submersible pump at the pool’s deepest point and route hoses to an approved drainage area, such as a sewer cleanout. Consider scheduling this project during dry weather when soil moisture remains stable to minimize groundwater pressure against the shell.
Drain gradually while monitoring continuously. Open the hydrostatic relief valve to equalize groundwater pressure. Remember, fiberglass pools rely on water for structural reinforcement, so never leave yours empty longer than necessary. Common reasons for draining include extreme water quality issues, significant repairs, or resurfacing needs. Clean and inspect surfaces immediately post-drain to identify repairs before refilling. Once your pool is ready for water again, close the hydrostatic valve and refill slowly to avoid stressing the pool structure.
Cleaning the Pool With TSP and Acetone
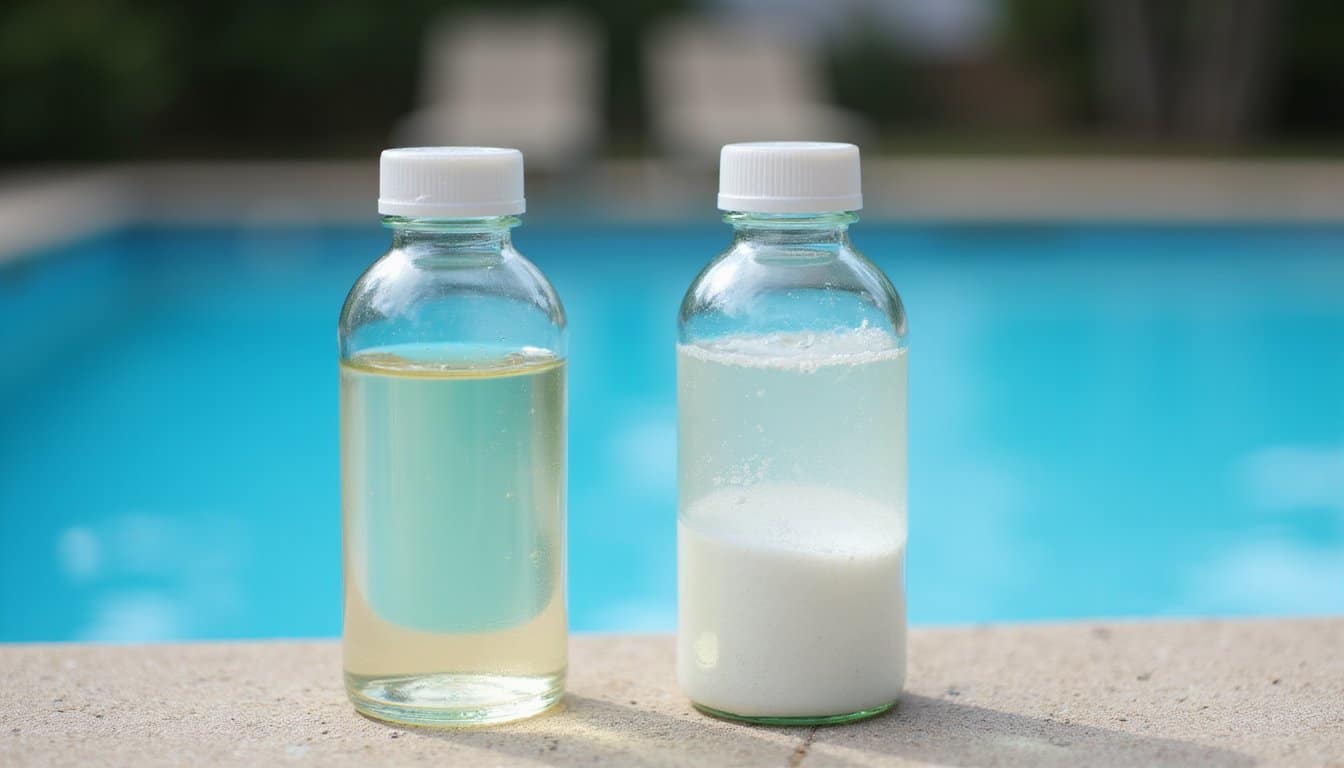
Once your fiberglass pool shell sits empty and you’ve completed your initial surface inspection, chemical cleaning becomes your next priority. Mix four ounces of TSP to two gallons of warm water, then scrub the entire surface in 10-foot sections using a stiff-bristled brush. Work walls first, then floors, rinsing immediately to prevent solution from drying. Vacuum debris with a wet/dry shop-vac post-scrubbing.
Following safety protocols, wear protective gloves, goggles, and a respirator throughout this process. After the TSP rinse dries completely, wipe surfaces with acetone using lint-free microfiber cloths, changing them frequently to avoid redepositing contaminants. This acetone wash improves paint adhesion on fiberglass surfaces by removing any remaining oils or residues. Use controlled bursts of compressed air to dislodge any remaining particulates from crevices and textured areas. This phosphate-free pool washing compound effectively removes dirt, grease, stains, and chalked paint to ensure optimal surface preparation. These paint prep requirements guarantee proper coating adhesion. Test dryness with white tissue before proceeding, confirming surfaces are completely residue-free.
Repairing Cracks and Chips With Fiberglass Reinforcement
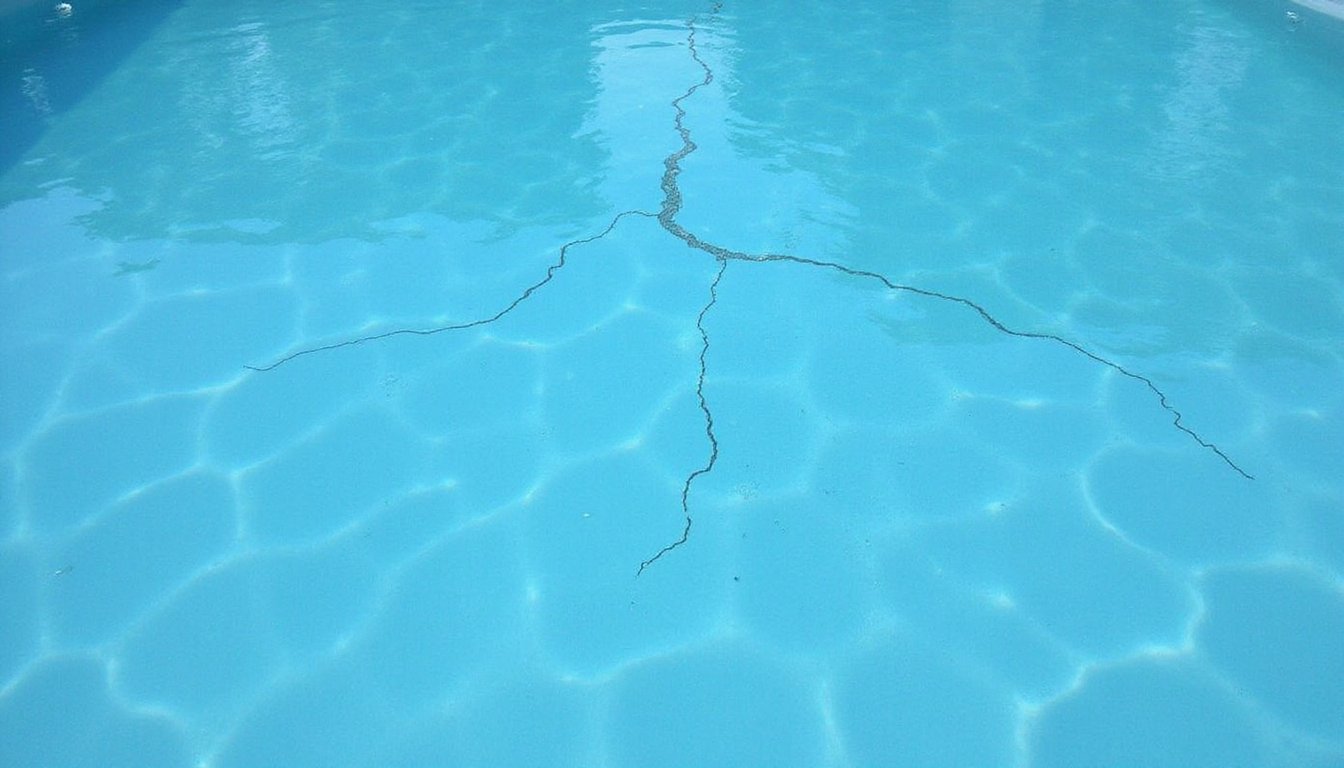
Before applying paint, you’ll need to address any cracks or chips by first smoothing the edges with light sanding or grinding to create a clean repair surface. It’s important to note that cosmetic gelcoat cracks do not affect the underlying fiberglass shell’s strength, but they still require proper repair before painting. For structural cracks that compromise pool integrity, Torque Lock Structural Staples offer a patented solution that locks cracks together with controlled compression before proceeding with surface repairs. Apply fiberglass patches using 36-ounce matting soaked in polyester resin, building up layers to achieve structural integrity and a quarter-inch thickness. This reinforcement creates a non-permeable surface that prevents water infiltration and guarantees your paint adheres properly to a stable substrate.
Smoothing Crack Edges First
After you’ve cleaned the damaged area and allowed any bond coat to fully cure, smoothing the crack edges becomes your next critical step for achieving a seamless repair. You’ll need to assess crack depth before selecting your approach, minor gel coat cracks require only light buffing, while deeper penetrations demand more aggressive preparation. Early leak detection through careful crack assessment can save you significant money and prevent minor issues from escalating into major structural problems.
| Tool | Application |
|---|---|
| 80-grit sandpaper | Initial edge feathering |
| Putty knife | Polyester putty application |
| Plastic spoon | Edge blending |
| Buffer | Final surface finishing |
Ensure proper cure time has elapsed before beginning edge work. Mix polyester putty to a creamy consistency, then use your putty knife to feather edges evenly. Sand crack edges with moderate pressure to create a smooth transition zone that promotes optimal putty adhesion and eliminates visible repair lines.
Applying Fiberglass Patches
When structural damage extends beyond superficial gel coat crazing, you’ll need to reinforce the repair with fiberglass matting to safeguard your pool’s integrity.
Selecting Reinforcement Materials
Not all fiberglass matting performs equally. Choose between bi-axial, tri-axial, woven, or chopped varieties based on damage severity. Remember, structural strength comes from the matting itself, not resins or topcoats, so multiple layers guarantee lasting durability.
Application Process
After applying epoxy bond coat and allowing complete cure time, lay your fiberglass cloth over wet gel coat. Press gently to eliminate air pockets and ascertain full saturation. For structural cracks that penetrate beyond the gel coat, consider utilizing torque lock staples, which provide controlled compression and even tension distribution across the repair area.
Allow each layer to cure completely before proceeding with putty application and finishing coats.
Creating Non-Permeable Surface
Once your fiberglass reinforcement layers have fully cured, you’ll need to create a non-permeable surface that prevents water infiltration and protects your repair’s structural integrity.
Apply gel coat matching your original pool color in thin, even layers using a brush or roller. This process focuses on eliminating surface porosity by building up multiple coats while sanding between applications with 80-grit sandpaper. Each layer should cure completely before adding the next.
The gel coat serves dual purposes: enhancing chemical resistance against pool sanitizers and creating a watertight barrier. You’ll attain ideal results by spraying additional gel coat layers, maintaining consistent thickness throughout. Sand between each application to guarantee proper adhesion and a smooth finish.
Verify your final surface shows no pinholes or voids that could allow water penetration beneath your repair.
Sanding Techniques for Optimal Paint Adhesion
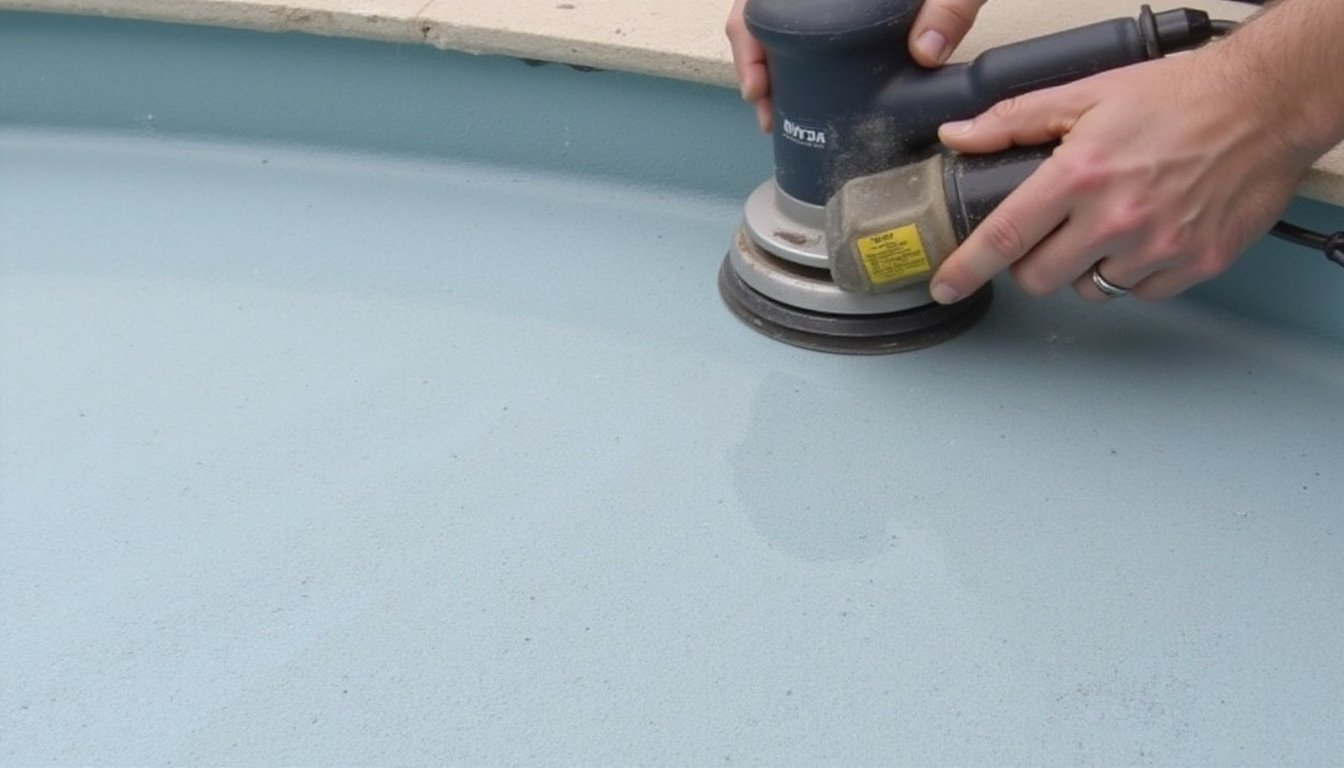
Proper surface preparation determines whether your pool paint adheres for years or peels within months, making sanding the most critical step in the refinishing process.
Skip proper sanding, and your pool paint will peel within months, surface prep is everything.
Begin with careful progress of grit selection, starting at 50-80 grit for rough fiberglass areas, then advancing to 400-800 grit for final gelcoat preparation. Use wet/dry sandpaper to prevent heat damage and gelcoat deterioration.
Sanding direction considerations directly impact mechanical bond strength. You’ll want to sand in straight lines or parallel grooves rather than random patterns, avoid orbital sanders entirely. Consistent directional strokes create the surface profile necessary for paint adhesion. According to manufacturer guidelines, sanding the fiberglass surface in straight lines with coarse sandpaper creates the mechanical bond needed for the epoxy coat to properly adhere.
After machine sanding large areas, hand-sand tight spots for complete coverage. Rinse sections frequently during wet sanding to prevent overheating, then inspect under bright light for uniform dullness. Professional contractors rely on orbital and detail sanders with variable speed control to achieve the best finish when preparing the surface for new coatings. When using power sanders, ensure you have a GFCI outlet and appropriate safety gear including goggles, gloves, and non-slip shoes to protect against electrical hazards and debris.
Understanding the Best Paint Options for Fiberglass Pools
Epoxy paints stand as the superior choice for fiberglass pool refinishing, offering a 5-8 year lifespan that outperforms alternative coating systems. When selecting best epoxy formulations, you’ll want two-part products that create chemical-resistant, non-porous barriers against chlorine, algae, and UV degradation. This durable finish is essential for protecting the pool’s base material from water damage and deterioration.
When evaluating top paint brands for fiberglass, consider these proven options:
- AquaGuard 5000: 100% solids epoxy phenolic resin engineered specifically for fiberglass substrates
- Platinum Ultra: Highest-grade two-part epoxy featuring a precise 1:1 mix ratio
- Platinum Plus: Premium formulation ideal for fiberglass recoat applications
- Poxolon 2 or Zeron: Requires Gunzite primer for most favorable adhesion
- Supreme epoxy paints: Delivers chlorine resistance with integrated UV protection
These formulations resist 21 chemicals including acid, saltwater, and gasoline while preventing osmotic blistering. With epoxy pool paint starting from $61.82, this coating option provides excellent value for the extended service life it delivers. Before applying any epoxy system, fiberglass surfaces require grinding or abrasion to achieve an adequate surface profile for proper adhesion.
Comparing Epoxy, Gel Coat, and Specialty Finishes
Several coating systems compete for dominance in fiberglass pool refinishing, but each offers distinct performance characteristics you’ll need to evaluate against your specific conditions.
Epoxy paint delivers superior durability with 6-8 year service life and exceptional chemical resistance. You’ll achieve paint coverage of 150-350 square feet per gallon, depending on surface preparation. Two-part epoxy formulations create hard, impermeable barriers ideal for 24/7 water immersion. As the most durable option available, epoxy paint also represents the highest investment among pool coating choices.
Epoxy paint stands as the gold standard for fiberglass pools, delivering up to 8 years of chemical-resistant protection.
Gel coat options expand your color selection greatly. Standard finishes provide consistent coloration, while shimmer and metallic variants incorporate reflective particles for enhanced aesthetics. Premium cultured finishes mimic natural stone textures.
Specialty fluoropolymers, introduced in 2020, offer vibrant pigmentation and represent emerging technology in pool resurfacing. High-build epoxies from specialist suppliers maximize chlorine resistance for demanding applications.
Applying the First and Second Coats of Pool Paint
You’ll start your first coat application in the deep end, working toward the shallow end while using ⅜-inch nap rollers for walls and brushes for cutting in corners and fittings. After allowing 16 to 24 hours of drying time, longer in high humidity or cool conditions, you’ll apply your second coat using the same technique to build proper film thickness. Full cure requires 5 to 6 days before filling, though you can walk on the surface with light foot traffic after 24 to 28 hours.
First Coat Application
Once you’ve completed surface preparation and confirmed the fiberglass is properly sanded and primed, you’re ready to begin the first coat application. Pour your mixed paint into a 5-gallon bucket with a paint screen after morning dew evaporates. Mixing paint for application requires proper thinning, 20% solvent for rubber-base or 10% water for acrylic enamel on bare surfaces.
Follow these application guidelines for ideal results:
- Start in the deep end, coating walls first, then floor, working toward the shallow end
- Use firm, overlapping strokes with a 9″ solvent-resistant roller for large areas
- Apply liberally to achieve consistent paint thickness, thin coats wear faster
- Begin and finish in corners to minimize visible roller marks
- Expect coverage of 225-250 square feet per gallon
Second Coat Curing
After your first coat has dried for 4-8 hours, you’re ready to apply the second coat, ideally on the same day to guarantee seamless intercoat adhesion. For proper second coat adhesion, reduce your paint volume by 20% compared to the first application. This adjustment safeguards optimal second coat thickness without excessive buildup that can lead to peeling or uneven curing.
Employ long, overlapping strokes with consistent pressure to achieve complete surface sealing. Maintain environmental conditions between 65°F-85°F with humidity below 50% throughout the curing process. Avoid direct sunlight exposure, which causes rapid curing, bubble formation, and visible roller marks.
Your epoxy coating will appear surface-dry relatively quickly, but full hardening occurs over several days. Allow 24-48 hours minimum cure time before proceeding with pool filling operations.
Curing, Sanding, and Finishing Your Painted Surface
The curing phase kicks off immediately after you apply your final coat, requiring strict adherence to manufacturer-specified timelines for ideal adhesion and durability. You’ll need 5, 7 days of outdoor dry time for epoxy paint to fully cure. During this period, verifying surface bonding readiness guarantees your coating has properly adhered before refilling.
Patience pays off, allow 5, 7 days of cure time before refilling to ensure lasting adhesion and durability.
Once cured, address any imperfections through proper finishing:
- Sand ridges flush with the pool surface using sandpaper or a power sander
- Spray the surface and wet-sand with higher grit paper to eliminate grooves
- Wipe down with a damp, lint-free cloth to remove all debris
- Apply surface tissue for a smooth fiberglass finish
- Evaluate the final surface for bonding readiness
Refilling Your Pool and Balancing Chemical Levels
Refilling your fiberglass pool involves a precise backfilling process that requires alternating six-inch increments of fill material with six-inch water additions to equalize hydrostatic pressure on both sides of the shell. You’ll maintain water level tolerance within 10cm inside and outside the pool throughout this procedure. Use crushed stone (16-32mm), gravel, or wet sand-concrete mix as your backfill material.
Once you’ve reached deck grade level and completed the fill, you’ll shift focus to water chemistry. Balancing pH levels between 7.2-7.6 safeguards your new paint finish from premature degradation. You’ll also need to concentrate on stabilizing chlorine levels to prevent oxidation damage to the cured coating.
Test your water chemistry daily during the first week. This monitoring secures suitable conditions for paint adhesion longevity and surface protection.
Frequently Asked Questions
How Often Should a Fiberglass Pool Be Repainted After the Initial Application?
You’ll typically need to repaint your fiberglass pool every 7 to 15 years, depending on paint longevity and environmental exposure. Your maintenance schedule considerably impacts this timeline, pools with consistent chemical balancing and UV protection extend recoating intervals toward the 15-year mark. High-traffic commercial installations may require resurfacing every 7 years. Watch for chalking, osmosis bubbles, or surface abrasion as indicators you’ve reached your gel coat’s service life threshold.
Can I Paint My Fiberglass Pool Underwater Without Draining It Completely?
You can perform partial pool paint application underwater for small damaged areas under 300 x 300 mm without complete draining. The underwater pool painting method requires high build epoxy, which offers limited color options but creates temporary fixes. However, you’ll need to address the damage cause first, whether mechanical, hydrostatic pressure, or osmosis. For full repainting, you must drain the pool to achieve proper surface preparation and coating adhesion.
What Temperature Is Too Cold for Painting a Fiberglass Pool?
You shouldn’t paint your fiberglass pool when temperatures drop below 50°F (10°C). Cold conditions compromise epoxy adhesion, slow curing rates, and risk blistering or coating failure. The ideal temperature range for application falls between 70-86°F (21-30°C), with surface temperatures at least 50°F above the dew point. Proper surface preparation means nothing if you’re applying coatings in suboptimal thermal conditions, you’ll experience incomplete polymerization and drastically reduced coating lifespan.
How Much Does Professional Fiberglass Pool Painting Typically Cost?
Professional fiberglass pool painting typically costs $1,000 to $2,000 for materials, with an average cost of labor adding $500 to $2,000 or more depending on your pool’s specifications. Factors affecting pricing include surface square footage, required prep work like sanding and priming, and the coating system you select. For a standard 1,000-square-foot pool, you’ll pay approximately $1.86 to $2.20 per square foot for professional application in 2025.
Will Painting My Fiberglass Pool Void the Manufacturer’s Warranty?
Painting your fiberglass pool will likely void your manufacturer’s warranty. Most gelcoat warranties explicitly exclude unauthorized surface modifications, and applying paint constitutes a permanent alteration to the factory finish. Before proceeding, you’ll want to review your specific warranty requirements carefully. Even with proper surface preparation techniques, manufacturers typically won’t honor claims once you’ve modified the original gelcoat. Consider whether the cosmetic benefits outweigh losing your remaining coverage protection.