


To build a fire pit area next to your pool, start by selecting a level location 10-15 feet from the water’s edge. Check local codes and obtain necessary permits before excavating 4-7 inches of soil for a stable foundation. Install drainage layers using ¾” gravel, fire-rated sand, and lava stones. Add weather-resistant seating, safety equipment, and coordinated landscaping elements. This sophisticated outdoor improvement requires careful attention to specific materials, clearances, and installation techniques for ideal results.
Planning Your Perfect Fire Pit Location
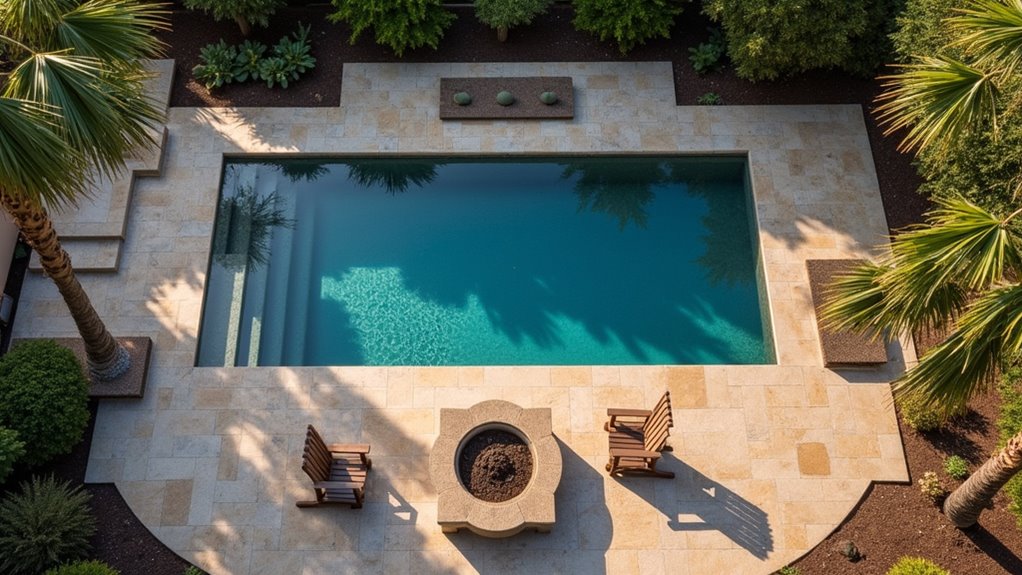
When designing your poolside fire pit area, careful location planning serves as the foundation for both safety and functionality. Start by reviewing site conditions, ensuring you’ll position your fire pit on a stable, fireproof base made of concrete, stone, or firebrick. While evaluating pool proximity, maintain a 10-15 foot clearance to prevent water splash and minimize risks from open flames. Consider adding elegant water bowls near the fire pit to enhance the tranquil atmosphere.
Your fire pit must also sit 10-20 feet away from any structures or flammable objects. Account for local wind patterns, as they’ll affect both flame control and ventilation, particularly near chlorinated pools where proper airflow is essential. Before starting construction, check local regulations to ensure your fire pit installation complies with all requirements. Since residential fire pits don’t require a protective shield, you can create a cozy space perfect for roasting marshmallows and hot dogs. Consider placing your fire pit in a spot that’s protected from strong gusts while maintaining adequate clearance from surrounding elements. This strategic positioning will create a safe, enjoyable outdoor environment.
Checking Local Codes and Obtaining Permits
Before breaking ground on your poolside fire pit project, local building codes and permit requirements must guide your design decisions. Start by verifying permit validity with your municipal building department and consulting municipal fire officials about specific safety requirements.
Always check local codes and consult officials before installing a poolside fire pit to ensure your design meets safety requirements.
Your compliance checklist should address:
- Maintain minimum 10-foot clearance between the fire pit and any structures, with 12-foot spacing from flammable materials
- Install proper fencing that meets pool safety standards, including height requirements and anti-climbing features
- Guarantee 5-foot clearance zones around pool fencing remain unobstructed
Submit detailed site plans showing fire pit placement, safety features, and pool enclosure specifications to obtain necessary permits. You’ll need to schedule required inspections throughout the construction process to verify compliance with both state and local regulations governing pool and fire feature installations. The anti-entrapment devices must be properly maintained and inspected when making any modifications to the pool area to ensure continued safety compliance.
Selecting the Right Fire Pit Style and Fuel Type
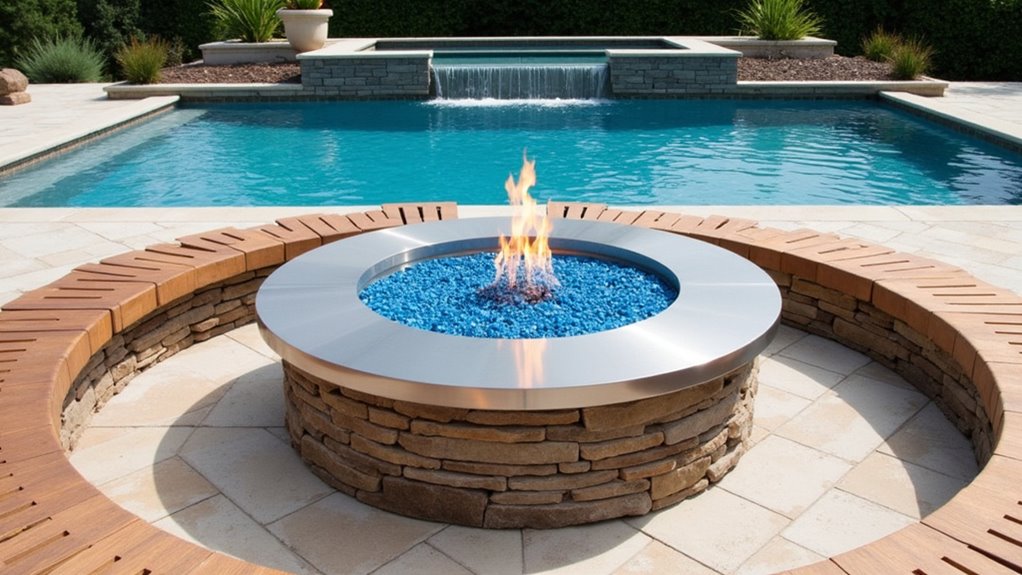
When selecting a poolside fire pit, you’ll need to weigh the authentic ambiance of wood-burning designs against the convenience and control of gas-powered options. Your material selection should prioritize weather-resistant, non-porous surfaces like concrete or metal that can withstand both pool chemicals and heat exposure. Consider how the fire pit’s shape and configuration will complement your pool’s aesthetics while maintaining proper safety clearances from swimming areas and structures. Crushed glass displays can add a mystical quality to natural gas fire pit flames, especially during nighttime gatherings. Incorporating fire pit seating around the pool area creates additional space for guests to gather and socialize.
Gas Vs Wood Options
As you plan your poolside fire pit, choosing between gas and wood fuel systems represents one of the most essential design decisions you’ll make. Gas-powered options deliver precise heat control and minimal maintenance requirements but come with higher upfront costs ranging from $8,000-$12,000, plus professional HVAC installation. Wood systems offer more affordable initial investment at roughly half the cost, with lower fuel cost in the long term. Gas fire pits incorporate safety monitoring systems that automatically shut off fuel flow if issues are detected. Wood-burning fire pits create a rustic ambiance that many homeowners find more appealing for outdoor gatherings. Gas fire pits provide a more elegant solution with their clean-burning flames that won’t irritate swimmers’ eyes or lungs.
Key differentiators to ponder:
- Gas systems provide instant, controlled heat with push-button ignition and no cleanup
- Wood fires require regular ash removal and fuel management but offer superior cooking capabilities
- Gas installations need permanent utility connections while wood pits offer placement flexibility
Your choice should align with your priorities between convenience and control versus traditional ambiance and cooking versatility, while factoring in your budget constraints and desired maintenance level.
Safe Material Choices
Selecting appropriate materials for your poolside fire pit extends beyond mere aesthetics, it’s a critical safety consideration that builds upon your fuel type decision. Focus on non-combustible materials like stone, concrete, or metal for your fire pit’s primary structure, ensuring maximum durability and heat resistance.
For wood-burning installations, incorporate heat resistant linings using fire bricks within a modular block or natural stone enclosure. If you’ve opted for a gas model, consider fiber-glass reinforced concrete (GFRC) or copper, which offer both durability and design flexibility. You’ll want to extend this safety-first approach to your surrounding surfaces, using non-combustible pavers or concrete for the immediate area. Stone veneer adhered to metal framing and concrete offers an attractive and durable finish for gas-powered fire pits. Remember to avoid wood, plastic, or resin materials anywhere near your fire zone, as these present significant flammability risks.
Preparing the Ground for Installation
You’ll need to verify the soil’s load-bearing capacity and drainage patterns before beginning any fire pit construction near your pool area. Clear away all vegetation, organic matter, and flammable ground cover within a 15-foot radius of your planned installation site to create a safe buffer zone. Using construction-grade leveling tools, establish a perfectly flat base surface by removing high spots and filling low areas with compacted gravel and sand layers. Use a small level to check the ground’s evenness every few feet during preparation. Consider using a fire-proof mat for added safety during the installation process. The proper ground preparation will help ensure optimal performance and extend your outdoor enjoyment with a sustainable fuel source for years to come.
Check Ground Stability First
Before breaking ground on your poolside fire pit, conducting a thorough ground stability assessment will prevent future structural issues and safety hazards. Start with a detailed soil quality assessment to confirm you’re working with hard-packed, stable ground rather than loose or sandy soil. During your water table examination, check for signs of poor drainage or standing water that could compromise your fire pit’s foundation. Contact call 811 service to identify underground hazards that could impact your installation.
Key stability factors you’ll need to verify:
- Evaluate soil firmness by walking the area, minimal indentation indicates proper compaction
- Check for slopes that could cause drainage issues, aim for flat, level surfaces only
- Locate and mark underground utilities, tree roots, or rocks that might interfere with excavation
Test the soil’s load-bearing capacity before proceeding with construction to guarantee long-term structural integrity.
Clear Flammable Ground Cover
After confirming your ground’s stability, proper site preparation becomes the foundation of a safe fire pit installation. Start by removing all flammable materials within a 10-foot radius of your planned fire pit area, including grass, leaves, and mulch. Excavate 4-7 inches of topsoil to expose non-organic subsoil, ensuring you’ve eliminated buried roots and plant matter.
Install a high-heat rated landscape fabric as your primary barrier, overlapping seams by 6 inches and securing with staples. This step is vital for maintaining fire resistant barriers and preventing weed regrowth. Complete the preparation by adding non-combustible ground cover like crushed gravel or pavers, extending 3-6 feet beyond the pit’s edge. Don’t forget to trim overhanging branches to at least 10 feet above the installation area to prevent ember-related hazards.
Create Level Base Surface
Creating a level base surface stands as the most vital phase of fire pit construction, directly impacting both safety and longevity. When preparing the ideal surface, excavate 2-3 inches of soil, removing all grass and organic material. You’ll want to use a hand tamper or plate compactor to guarantee proper soil compaction before adding your base materials.
For ensuring level base construction, incorporate these essential steps:
- Install 2-3 inches of compacted gravel or crushed stone as your primary foundation, providing indispensable drainage and stability
- Layer landscaping fabric beneath the gravel if soil migration is a concern
- Check levelness in multiple directions using a carpenter’s level, adjusting and retamping until achieving consistent results
Remember to maintain a slight slope away from your pool area for proper water runoff while preserving the general levelness of your fire pit base.
Creating a Stable Foundation Base
A stable foundation serves as the cornerstone of any successful fire pit installation near your pool area. You’ll need to start by improving base strength through strategic layering while guaranteeing moisture control for long-term stability.
| Layer Type | Material | Purpose |
|---|---|---|
| Bottom | ¾” Gravel | Drainage & Support |
| Middle | Fire-rated Sand | Heat Distribution |
| Top | Lava Stones | Airflow & Protection |
Begin by removing sod and topsoil to a 2-inch depth, then compact the exposed soil firmly. Add your gravel layer and compress it using a plate compactor. Maintain a minimum 10-foot clearance from your pool’s edge, and verify you’ve incorporated proper drainage slopes. The finished base should be perfectly level and stable enough to support your fire pit structure without settling or shifting over time.
Installing Safety Features and Barriers
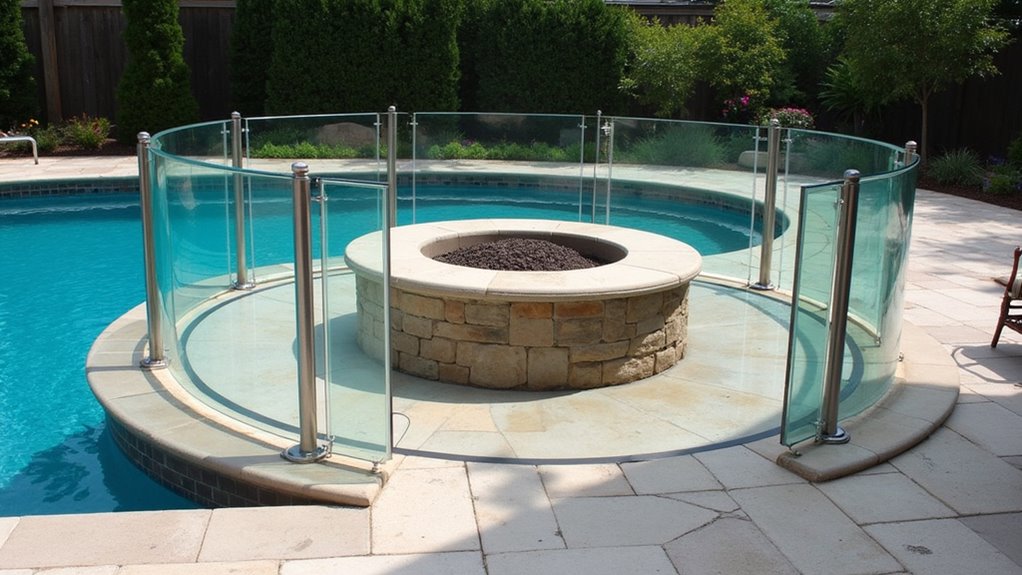
When installing your fire pit near a pool, you’ll need to establish a clear protective zone by maintaining a minimum 10-foot separation from pool barriers and installing nonflammable coping around the pit’s perimeter. You should position mesh fencing or glass barriers strategically between the pool and fire pit areas to prevent both water splash and ember spread while ensuring all gates remain easily accessible for emergency exits. For added security, mount emergency equipment like fire extinguishers and pool safety gear on dedicated posts within quick reach of both areas.
Protective Zone Installation
Safety features and barriers serve as critical components in the fire pit and pool zone, requiring precise installation to meet stringent code requirements. When establishing compliant barrier requirements, you’ll need to install fencing that’s 48-60 inches high with a maximum ground clearance of 2-4 inches. Proper smoke dispersion techniques require positioning your fire pit at least 10 feet from the pool and structures.
Key protective elements to implement:
- Install self-closing, self-latching gates with release mechanisms positioned 54 inches above ground
- Surround your fire pit with a 12-inch-wide nonflammable coping material, extending to 16 inches if used for seating
- Position the burner assembly minimum 4 inches from coping edge while considering prevailing wind patterns
Remember to verify your local jurisdiction’s specific requirements, as codes may vary by region.
Emergency Equipment Placement
Properly positioned emergency equipment forms the backbone of your fire pit area’s safety system. Start by installing a dry-chemical fire extinguisher with Class B and C ratings within immediate reach. Mount it in a visible, easily accessible location that won’t be blocked by furniture or decor.
You’ll need to establish clear pathways for emergency responders and guarantee operator training for all designated fire pit managers. Position a garden hose with spray nozzle settings nearby, and store a bucket of sand in a weather-protected, accessible spot. Include heat-resistant gloves and long-handled tools in your safety arsenal.
Create a designated storage area for all emergency equipment that’s protected from pool splash zones but remains quickly accessible. Regular equipment checks and maintenance should be part of your routine safety protocol.
Setting Up Proper Drainage Systems
As water management plays a pivotal role in outdoor fire features, establishing an effective drainage system becomes vital for your poolside fire pit’s durability. Consider additional drainage enhancements by installing a gravel base at least four inches deep, which will efficiently promote water dispersal and provide structural stability.
To investigate advanced drainage system options, you’ll want to integrate these key elements:
- Install PVC drainage pipes beneath the gravel layer to redirect water away from your fire pit
- Grade the surrounding area to channel rainwater toward designated drainage points
- Incorporate a built-in drainage system that connects to existing yard drains or ditches
Remember to maintain proper distances between your pool and fire pit drainage systems to prevent cross-contamination and confirm compliance with local safety codes. Professional installation will guarantee ideal performance and longevity.
Designing Comfortable Seating Areas
Creating an inviting seating arrangement around your poolside fire pit requires strategic placement and thoughtful material selection to optimize both comfort and functionality. Position low-profile sectional sofas inches above your deck surface, complemented by modern furniture styles like aluminum-framed pieces with mesh seating. You’ll want to establish clear zones that radiate from your fire pit while maintaining open circulation paths to the pool.
Incorporate weather-resistant materials such as teak or all-weather wicker, paired with fade-resistant cushions for extended comfort. Consider integrating outdoor lighting solutions along pathways and seating areas for ambiance and safety. Add versatility with stackable stools and nesting tables that you can easily rearrange. For sophisticated layouts, position matching chaise lounges symmetrically, and define spaces using outdoor rugs that complement your comprehensive design scheme.
Adding Essential Safety Equipment
Safety equipment forms the backbone of any well-designed poolside fire pit area, building upon your carefully planned seating arrangement. Start by equipping your space with a dry-chemical fire extinguisher rated for Class B and C fires, guaranteeing proper extinguisher maintenance through regular pressure checks and expiration monitoring.
Your essential safety setup should include:
- Heat-resistant gloves and closed-toe shoes for safe fire pit operation
- A fitted mesh cover to contain sparks during use
- Clearly marked pathways for emergency access and quick evacuation
Position your safety equipment within easy reach, regularly inspecting for damage to preserve ideal functionality. Remember to verify that your fire pit placement maintains the required 10-15 feet distance from the pool edge, and confirm all materials meet local fire codes and safety regulations.
Finishing Touches and Landscaping Elements
Three key design elements transform a basic poolside fire pit into a refined outdoor retreat: architectural finishes, strategic plantings, and thoughtful lighting.
Select coordinated material finishes that create visual harmony, pair natural stone pavers with complementary fire pit surrounds and pool coping. Amplify the space through creative plantscaping, incorporating low-maintenance boxwoods and ornamental grasses to define borders and provide year-round structure. Install monolithic rows of greenery to effectively separate your fire and pool zones while maintaining visual flow.
For evening ambiance, layer your lighting design with string lights overhead, pathway illumination, and accent lighting that highlights architectural features. Consider adding under-seat LEDs or floating pool candles to extend the warm glow throughout the space. Complete the design with weather-resistant furniture that echoes your chosen style, whether modern or rustic.
Frequently Asked Questions
Can I Use My Fire Pit During Rainy Weather?
You shouldn’t operate your fire pit during rain due to critical moisture considerations and safety risks. Rain makes lighting and maintaining flames nearly impossible while creating dangerous conditions. Instead, focus on proper weather protection by installing a high-quality vinyl or metal cover to shield your pit when not in use. If you’re determined to enjoy outdoor fires, wait until precipitation stops and surfaces have dried completely.
How Long Should I Wait After Swimming Before Sitting by Fire?
You’ll want to wait 15-20 minutes after swimming to guarantee you’re completely dry before approaching the fire pit. During this time, your body temperature will stabilize, and your skin’s natural protective barrier can readjust. Pat yourself dry thoroughly with a towel to minimize smoke inhalation risks, as wet skin can create steam that mixes with smoke. For ideal dry skin protection, apply a moisturizer before sitting by the fire.
What Type of Lighting Should I Install Around the Fire Pit?
You’ll want to layer your fire pit lighting with both functional and atmospheric elements. Install string lighting options overhead to guarantee a warm, festive ambiance while maintaining visibility. Add subtle path lighting at ground level to ascertain safe navigation without competing with the fire’s glow. Consider installing adjustable LED fixtures with dimming capabilities around seating areas, and incorporate brass sconces on nearby walls for a sophisticated, cohesive design.
Should I Cover My Fire Pit When the Pool Is Being Used?
Yes, you should absolutely cover your fire pit when the pool is in use. When you choose your fire pit’s material, guarantee it includes a compatible mesh or hard cover designed for safety. As you determine the fire pit’s size, select a cover that fits securely to prevent sparks, embers, and debris from causing hazards. A proper cover will also protect your fire pit’s components from water damage and pool chemicals while maintaining air quality for swimmers.
Can Chlorine Fumes Affect the Fire Pit’s Metal Components Over Time?
Yes, chlorine fumes can vastly degrade your fire pit’s metal components through accelerated corrosion. You’ll need to ponder metal corrosion risks when planning your firepit placement deliberations, as chlorine vapors from your pool can react with steel and iron components. To safeguard your investment, you’ll want to either choose corrosion-resistant materials like 316 stainless steel or maintain protective coatings on standard metals. Regular inspections will help you identify early signs of deterioration.