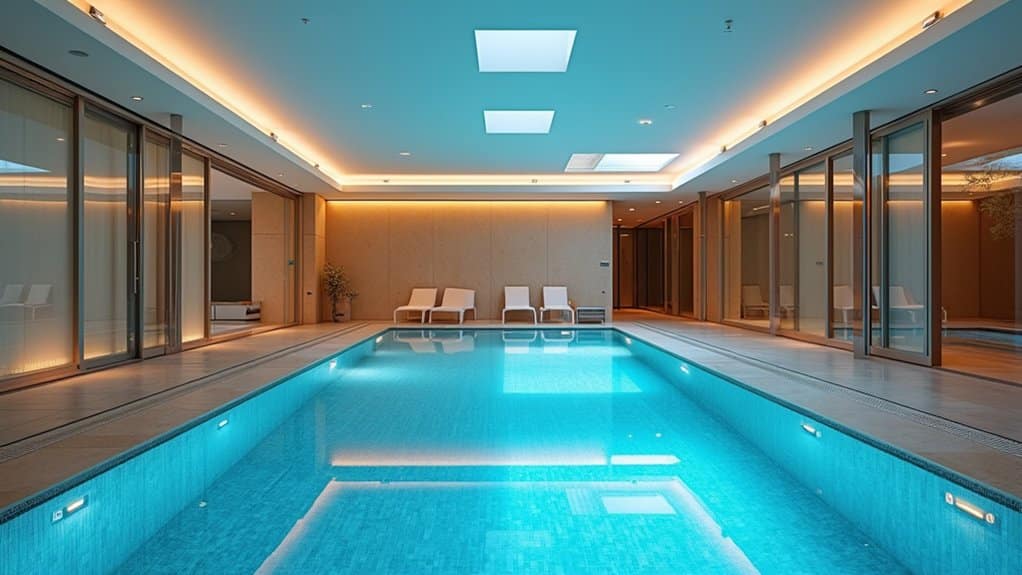
After plastering your pool, you’ll need to follow strict chemical protocols for the first 28 days. Run filtration continuously for 72 hours while monitoring pressure and cleaning filters. Test pH levels multiple times daily, targeting 7.2-7.6, and maintain alkalinity between 80-120 ppm. Don’t activate skimmers initially, and avoid harsh chemicals like muriatic acid or metal algaecides. Following these essential guidelines protects your investment, but proper chemical maintenance involves additional critical steps and precise timing. Additionally, after the initial maintenance phase, it’s important to implement regular structural treatments for swimming pools to ensure longevity and prevent damage. This includes resurfacing as needed and inspecting for any signs of wear or leaks that may arise over time.
Critical First 72-Hour Chemical Protocol

During the critical 72-hour period following plaster application, maintaining precise chemical and mechanical protocols is essential for proper surface curing. You’ll need to run your filtration system continuously while monitoring system pressure and cleaning filters for effective plaster dust management. Don’t activate your skimmers initially, as this can redistribute settling dust throughout the pool. Test and record fill water chemistry before beginning the startup process. Brush twice daily during the first two weeks to ensure proper plaster pore opening. After the curing period, begin using skimmers to maintain clarity and watch for settling dust. Keep essential supplies for pool plaster work such as brushes, testing kits, and cleaning tools on hand to ensure a smooth startup and longer-lasting plaster.
For ideal results, you’ll need to brush the pool’s walls daily using a nylon brush, avoiding metal brushes that can scratch the surface. Keep alkalinity at 80 ppm during the first day for optimal results. Don’t add chlorine or other sanitizers during this period, and keep your heater off until the dust is completely removed. When you’re ready to introduce chemicals, pre-dilute them and add them to the water gradually, following manufacturer specifications for proper dosage.
Managing Ph and Alkalinity Levels
You’ll need to test pH levels multiple times daily during the first 72 hours, using a reliable digital meter or fresh test strips to guarantee accuracy. Your alkalinity adjustments should precede pH corrections, targeting 80-100 ppm with sodium bicarbonate for low levels or pre-diluted acid for high levels. When balancing these interrelated parameters, you must consider how pH shifts can affect alkalinity and vice versa, making incremental adjustments rather than large chemical doses that could shock the fresh plaster. Remember to thoroughly brush the pool surface after adding any chemicals to ensure proper distribution throughout the water.
Ph Testing Best Practices
Proper pH testing serves as the cornerstone of post-plaster chemical maintenance, requiring precise measurement protocols and consistent monitoring practices. You’ll need to conduct daily pH testing for the first 14 days, maintaining levels between 7.2 and 7.6. For accurate chemical testing, calibrate your meters daily using buffer solutions and guarantee full electrode submersion during measurements. Modern digital pH sensors with Intelligent Sensor Management capabilities can provide predictive diagnostics for more reliable measurements. Store your electrodes in storage solution between tests to prevent bacterial growth and extend their lifespan.
When testing masonry surfaces, use pH pencils with distilled water for reliable readings. Don’t rush the process – wait 30 days for proper curing before conducting extensive pH monitoring. Keep your testing equipment clean by rinsing electrodes with deionized water between measurements. For enhanced precision, utilize multi-point calibration when your meter allows it, and always verify electrode responsiveness, especially in high-pH environments.
Alkalinity Adjustment Methods
Building on accurate pH testing practices, effective alkalinity management requires precise chemical adjustments and systematic monitoring protocols. You’ll need to maintain alkalinity between 80-120 ppm using targeted chemical interactions, applying 1.5 pounds of sodium bicarbonate per 10,000 gallons to raise levels. Alkalinity resists change in swimming pool water, providing crucial stability for other chemical parameters. Metal corrosion may occur if alkalinity drops too low, damaging pool equipment and fixtures. Regular testing of water chemistry helps maintain optimal sanitization and prevents issues from developing.
For alkalinity adjustment, first confirm your pH is at 7.0, then add chemicals while the pump runs for even distribution. When levels are high, add acid incrementally, testing after each dose. For low alkalinity, carefully measure sodium bicarbonate additions to avoid overcorrection. Monitor your pool for warning signs like cloudy water or surface scaling, which indicate imbalances. Always wear protective gear when handling chemicals and retest alkalinity every 4-5 days until levels stabilize within the target range.
Balancing Chemical Interactions
Managing ideal chemical balance requires a systematic approach to pH and alkalinity levels during the critical post-plaster period. You’ll need to maintain pH between 7.2-7.6 and alkalinity at 80-120 ppm to prevent unwanted chemical reactions and interaction consequences.
| Timeline | Chemical Focus | Required Action |
|---|---|---|
| Days 1-2 | pH/Alkalinity | Stabilize levels, no sanitizers |
| Days 3-28 | Sanitizers | Introduce liquid chlorine gradually |
| Days 3-30 | Daily Testing | Monitor chemical balance |
| Post 28 Days | Normal Care | Maintain 1.0-3.0 ppm chlorine |
Pre-dissolve all chemical additives to prevent localized pH spikes. You’ll need to run filtration 24/7 for the first 72 hours to guarantee even distribution. Avoid salt systems and trichlor tablets initially, as they’ll disrupt the pH-alkalinity equilibrium. Remember to adjust alkalinity first, as it provides the essential buffering capacity for stable pH maintenance.
Calcium Hardness Requirements
Calcium hardness (CH) levels demand precise control during the post-plaster phase to protect your pool’s new surface. Begin with baseline testing to measure initial calcium sources, and use reliable hardness measurement tools like digital testers or test strips to monitor levels consistently. Similar to Swimming Pool Water Chemistry discussions, proper water balance is essential for plaster longevity.
You’ll need to maintain CH at 80-150 ppm during the first three days, then gradually increase to 200 ppm over the initial 28-day period. Following NPC guidelines is crucial for optimal results. Don’t exceed 20 pounds of calcium chloride per day, and always pre-dissolve it before adding to your pool. You’ll want to brush the surface twice daily to manage plaster dust that can affect readings.
After the startup phase, target a CH range of 250-350 ppm for ideal long-term protection. Remember to maintain proper pH (7.2-7.6) and total alkalinity (70-80 ppm) before making any CH adjustments.
Sanitizer Application Guidelines

Proper sanitizer application represents the next key phase in protecting your new plaster surface. You’ll need to carefully time your initial sanitizer introduction, waiting at least 72 hours after filling and confirming stable water chemistry through testing. For outdoor pools, don’t add stabilized chlorine until pH and alkalinity levels reach equilibrium.
When selecting sanitizer types, start with liquid chlorine for rapid stabilization. You’ll want to delay bromine systems and saltwater chlorination until the chemistry fully stabilizes. Follow specific application methods: dissolve granular products before adding, broadcast evenly across the pool’s surface, and avoid direct skimmer application. Maintain continuous filtration during the first 72 hours, conduct daily testing, and adjust levels based on results. Your ongoing maintenance should include weekly chemistry checks to guarantee proper sanitizer residuals.
Chemical Restrictions During Curing
During the critical curing period of your new plaster surface, strict chemical restrictions must be followed to guarantee proper hydration and prevent long-term damage. Chemical interactions during this phase can greatly impact the curing effects, potentially compromising your pool’s finish integrity. The slow curing process requires careful attention to ensure crystals form properly within the plaster matrix. Consistent moisture levels are essential, as wet curing methods help achieve maximum strength and durability.
To maintain ideal chemical balance during curing:
- Keep pH levels between 7.8-8.2 and total alkalinity at 80-120 ppm, making adjustments no greater than 0.2 units per day
- Don’t add muriatic acid, phosphate removers, metal-based algaecides, or stabilizers within the first 28 days
- Avoid using harsh cleaners, flocculants, or clarifiers that could interfere with proper cement hydration
You’ll need to test water chemistry twice daily initially, as calcium hardness naturally increases throughout the curing process. This vigilant monitoring helps prevent scaling and surface defects.
Water Chemistry Testing Schedule

During the first three days after plastering, you’ll need to test pH, Total Alkalinity, and Calcium Hardness daily, maintaining levels at 7.2-7.6, 70-100 ppm, and 150-200 ppm respectively. Your testing schedule should continue daily through Day 14, with additional monitoring of chlorine levels starting at Day 3 (1.5-3 ppm) and Cyanuric Acid beginning at Day 4 (30-50 ppm). After Day 14, you can shift to weekly or biweekly testing as water chemistry stabilizes, while maintaining vigilance on all parameters to guarantee proper curing of your new plaster surface. Using a FAS/DPD test kit provides the most accurate chlorine readings during this critical monitoring period.
Testing Parameters and Frequencies
To maintain ideal plaster curing conditions, a rigorous testing schedule must be followed through distinct phases of the startup process. Testing variations and frequency importance are critical during the initial 28-day period, with specific parameters requiring daily monitoring to guarantee proper curing.
Follow these essential testing protocols:
- Monitor pH (7.2-7.6), Total Alkalinity (70-100 ppm), and Calcium Hardness (150-200 ppm) daily during the first 28 days
- Test Free Chlorine levels 15 minutes after chemical additions, maintaining 1.5-3 ppm after Day 3
- Check Cyanuric Acid weekly once introduced (Day 4-7), targeting 30-50 ppm
After the 28-day startup phase, you’ll shift to a less intensive schedule guided by LSI measurements, with weekly pH/TA/CH testing and biweekly CYA checks becoming standard practice.
Daily Chemical Balance Routines
Maintaining proper water chemistry through systematic daily testing forms the cornerstone of successful post-plaster pool care. During the first three days, you’ll need to monitor pH, total alkalinity, and calcium hardness levels daily to establish baseline readings and detect chemical fluctuations early.
Your routine assessments should focus on keeping pH between 7.2-7.6 and total alkalinity at 80-100 ppm through precise adjustments. From Day 3, you’ll introduce chlorine at 1.5-3 ppm using pre-diluted solutions. By Day 4, add cyanuric acid to reach 30-50 ppm for chlorine stabilization. Test calcium hardness daily, making incremental 10-lb calcium chloride additions to achieve ideal levels. After 28 days, you’ll apply the Langelier Saturation Index to guarantee long-term water balance stability.
Stain Prevention and Sequestering
Proper stain prevention and sequestering in newly plastered pools requires a thorough approach to water chemistry management and mineral control. You’ll need to maintain consistent levels of sequestering agents while implementing an extensive stain removal strategy that addresses both metallic and organic contaminants. A slow fill process can contribute significantly to surface staining and discoloration if not properly managed. Regular testing helps identify corrosive conditions that could damage plaster surfaces.
Effective stain prevention in new plaster pools depends on precise chemical management and ongoing mineral sequestration to protect against discoloration.
Key preventive measures include:
- Apply chelating agents according to manufacturer specifications to bind calcium and metal ions before they can form stubborn deposits
- Use vitamin C (ascorbic acid) treatments proactively to neutralize metals that could potentially stain your plaster
- Monitor and adjust chlorine levels carefully, temporarily reducing to 0 ppm during targeted stain treatments
Remember to circulate your pool water thoroughly when adding any chemical treatments, and maintain your LSI between -0.5 and +0.5 to prevent mineral-based staining issues from developing in your newly plastered surface.
Chemical Safety and Handling
Safe handling of pool plaster chemicals requires strict adherence to established safety protocols and protective measures. You’ll need to implement thorough safety measures to minimize chemical exposure risks during application and maintenance processes.
| Protection Type | Required Equipment | Safety Protocol |
|---|---|---|
| Respiratory | N95 respirators | Maintain <3mg/m³ respirable concentration |
| Skin Contact | Chemical-resistant gloves | Use tools for mixing/application |
| Eye Safety | Protective goggles | Guarantee proper ventilation |
| Body Coverage | Long sleeves/pants | Monitor air quality regularly |
| Emergency | First aid supplies | Rinse contacts immediately |
When handling plaster materials, you must maintain proper ventilation and utilize dust collection systems. Don’t work without proper PPE, and always decontaminate equipment after use. Store chemicals in sealed containers away from moisture, and never dispose of materials in drains or waterways.
Long-Term Chemical Maintenance Strategy
To protect your pool’s plaster investment, you’ll need a thorough chemical maintenance strategy that addresses multiple water chemistry parameters. Focus on maintaining chemical stability through consistent monitoring and seasonal adjustments of your water balance. In addition to monitoring water balance, it’s crucial to regularly check for signs of wear and tear on the plaster surface, as neglecting these can lead to more significant issues over time. Consider consulting a professional or a reliable guide for pool surface refinishing if you notice any cracks or discoloration.
Proper chemical maintenance and regular monitoring are essential safeguards for protecting your pool’s plaster and maintaining long-term water balance.
- Test and adjust pH (7.2-7.6) and alkalinity (80-120 ppm) weekly, using the Langelier Saturation Index to prevent scaling and etching while maintaining calcium hardness between 200-400 ppm
- Keep free chlorine levels at 1.0-3.0 ppm, stabilized with cyanuric acid (30-50 ppm), and avoid trichlor tablets that can damage plaster surfaces
- Apply sequestering agents annually, conduct Film-Free testing semi-annually, and maintain proper filtration flow rates to prevent stagnation and mineral deposits
Monitor TDS levels regularly and adjust your maintenance schedule based on local climate conditions and usage patterns.
Frequently Asked Questions
Can I Use Alternative Sanitizers Like Bromine Instead of Chlorine?
While bromine offers advantages like better performance in warm water and less odorous byproducts, it’s not recommended for newly plastered pools. When comparing sanitizers, bromine’s slower dissolution rate and UV sensitivity make it less suitable for initial pool care. You’ll get better results with chlorine during the plaster curing phase due to its stronger oxidation capacity, wider pH tolerance, and more precise control over sanitization levels.
What Happens if My Pool Water Accidentally Freezes During Curing?
If your pool water freezes during the curing process, you’ll face serious structural issues. Frozen water effects cause damaging expansion, leading to cracks and spalling in your new plaster. The plaster curing impact is particularly severe, as freezing temperatures halt essential hydration reactions that create strong chemical bonds. You’ll likely experience premature deterioration, increased porosity, and weakened structural integrity. Ultimately, this could require costly repairs or complete replastering to address the damage.
How Do Weather Conditions Affect Chemical Balance During the Curing Process?
Temperature fluctuations and humidity impact greatly affect your plaster’s chemical balance during curing. High temperatures accelerate chemical reactions, leading to rapid water evaporation that can disrupt proper mineral formation. You’ll notice that excessive humidity slows down the curing process, potentially weakening the plaster’s final structure. To maintain ideal chemical stability, you’ll need to monitor and maintain temperatures above 4.4°C while controlling moisture levels through proper ventilation.
When Can I Add Decorative Pool Lighting After Plastering?
You’ll need to wait a full 30 days after plastering before installing any decorative lighting to guarantee proper plaster curing. This mandatory waiting period allows the plaster to achieve ideal bonding with the pool shell and prevents potential damage from core drilling or modifications. If you’re planning to add lights without existing conduit, you’ll need professional core drilling services. For quicker alternatives, consider surface-mounted fiber optic options that don’t require penetrating the pool wall.
Is It Safe to Use Pool Covers During the Initial Curing Period?
You shouldn’t use pool covers during the initial plaster curing period (first 28 days). Covers interfere with vital daily brushing requirements and can trap plaster dust, leading to staining and improper curing. They’ll also disrupt essential water circulation patterns and chemical balancing processes. If you need partial coverage, you can use covers only at night after Day 7, but you must remove them daily for brushing and chemical maintenance.