
To build a DIY pool waterfall, you’ll need Schedule 40 PVC pipe, basic power tools, and safety equipment like gloves and eye protection. Start by leveling your installation site and marking precise measurements for the frame. Install proper plumbing with ball valves and union connectors, ensuring leak-proof connections throughout. Create a stable foundation using crushed stone, then add waterproofing and decorative rocks. For a professional-grade result, careful planning and systematic execution will guide your transformation into a backyard haven.
Planning Your Pool Waterfall Design
While creating a pool waterfall can transform your backyard into a serene haven, proper planning is essential for a successful installation. You’ll need to carefully assess your pool’s size, shape, and structural capacity to determine the most suitable waterfall design. Consider hydrostatic pressure factors when selecting your feature’s location and size to guarantee your pool’s structure can handle the supplementary weight and water flow. Creating a sleek modern appearance through sheet-style waterfalls can provide an elegant, contemporary look to your pool area. Incorporating slip-resistant materials around the waterfall area will enhance safety and prevent accidents. For optimal durability and aesthetics, selecting between natural stone options will require evaluating their weight-bearing requirements and visual appeal.
Before purchasing materials, evaluate your existing pump system’s capabilities and equipment maintenance requirements. You’ll want to measure available deck space and maintain safe distances from pool edges. Choose a location that optimizes both visual impact and practical functionality, keeping in mind plumbing access points and power supply. If you’re planning a larger feature, factor in potential equipment upgrades to support proper water circulation and cascade effects.
Gathering Essential Materials and Tools
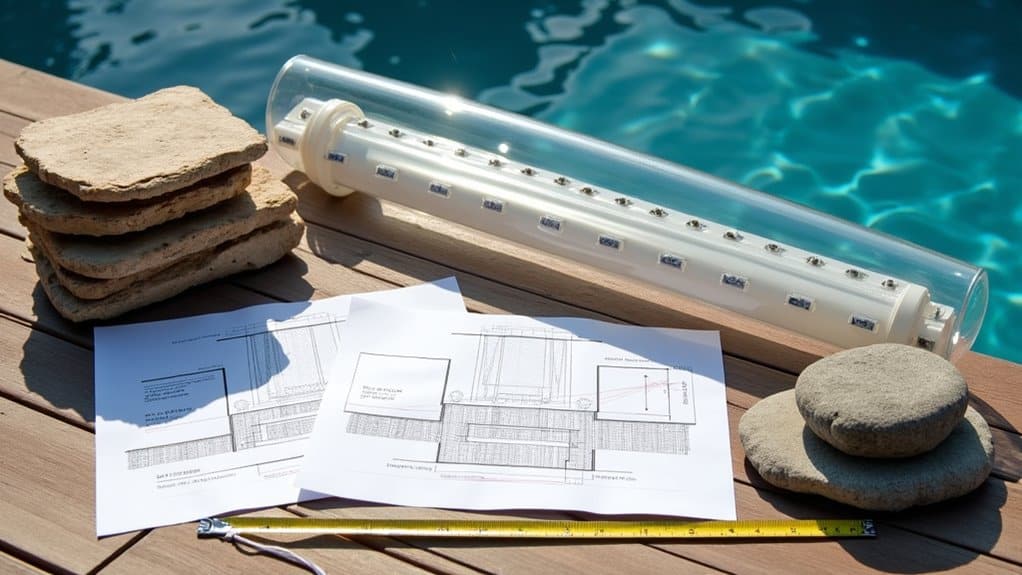
You’ll need essential plumbing components including Schedule 40 PVC pipe, fittings, ball valves, and union connectors to create a reliable water circulation system. For precise cuts and assembly, equip yourself with a circular saw, reciprocating saw, drill, and screw gun, ensuring each tool has fresh blades and bits. Before starting any construction, gather safety equipment including work gloves, safety glasses, ear protection, and a dust mask to protect yourself during cutting and cement work. To ensure proper installation, you’ll need to prime all PVC components before final assembly. Include silicone and screens in your materials list to properly seal the pump box and prevent debris from interfering with pump operation. Consider selecting from popular models like the Maldives or Serenity waterfall kits to achieve your desired tropical paradise effect.
Basic Plumbing Components Required
Before beginning your DIY pool waterfall project, gathering the correct plumbing components guarantees a properly functioning and leak-free installation. You’ll need Schedule 40 PVC pipe (typically 1.5″-2″ diameter) for main runs and flexible PVC for curved sections. Essential fittings include elbows, tees, and unions for pipe joints and future maintenance access. Three deck screws are required for securing mounting blocks to the concrete surface. Installing a comprehensive filtration system will help maintain water clarity and prevent debris buildup in your waterfall.
To ascertain leak prevention, you’ll require proper valves: ball valves for flow control, three-way valves for water diversion, and check valves to prevent backflow. Don’t forget PVC primer and glue for creating watertight seals at connections. Install pressure test plugs to verify system integrity before final assembly. Include shut-off valves at strategic points for easier maintenance, and use appropriate couplings to join different pipe sections securely.
Power Tools Selection Guide
Building a pool waterfall requires the right power tools to complement your plumbing setup. You’ll need a 7-amp drill for pilot holes and a screw gun for consistent torque when securing frames. Choose a 7¼-inch circular saw for precise lumber cuts, and add a reciprocating saw for detailed shaping of components. Since waterfall construction involves custom molded products, having proper tools ensures precise fitting of all waterfall components.
Consider corded power tool benefits for uninterrupted work during major construction phases, while cordless power tool mobility proves useful for hard-to-reach areas. Guarantee your tools feature water-resistant components, including sealed switches and non-slip grips for safe operation in damp conditions. Support these power tools with essential measuring equipment like levels and tape measures for accurate alignment. Don’t forget to select tools with dust extraction ports and LED work lights for amplified visibility and cleaner operation during installation.
Safety Equipment Essentials
While constructing a pool waterfall demands careful attention to detail, proper safety equipment forms the foundation of a secure installation process. You’ll need to prioritize essential protective gear, including safety goggles, heavy-duty gloves, steel-toed boots, and a respirator for dust protection. When operating power tools, don’t forget hearing protection to prevent long-term damage.
Proper PPE maintenance is vital for equipment longevity and effectiveness. Clean your gear regularly, checking for wear and damage before each use. Follow strict PPE storage protocols by keeping your equipment in a dry, secure location away from chemicals and direct sunlight. Store safety gear in designated containers, and maintain clear labels on all hazardous materials. Remember to establish proper electrical safeguards by using GFCI-protected outlets and waterproof enclosures throughout your work area.
Preparing the Installation Site
You’ll need to level the ground completely using a bubble level and crushed stone base before proceeding with any waterfall installation. After establishing a level foundation, mark your precise installation location using stakes and construction ribbon, ensuring you’ve accounted for the recommended 1-inch clearance on all sides of the waterfall unit. Make sure to measure 3.5 inches down from the frame’s top edge before marking your notch area. Clear away all vegetation, debris, and loose materials within a 3-foot radius of your marked installation zone to create a safe, unobstructed work area.
Level Ground First
Before installing a pool waterfall, establishing level ground serves as the critical foundation for the entire project. Start by evaluating ground slope with a laser level or transit, ensuring a minimum 2% grade away from the pool for proper drainage. You’ll need to scrutinize soil conditions carefully, removing any organic debris and testing for stability.
Create a solid base by laying 4-6 inches of compacted gravel or crushed stone. If you’re working with loose or sandy soil, install geotextile fabric first for added stability. Use stakes and ribbon to clearly define your work area before beginning any construction. For precise installation, mark your layout using string lines and check measurements twice before excavating. Remember to investigate existing drainage patterns and integrate French drains or weeping tiles if needed. Keep your leveling tolerances within 1/4 inch to guarantee proper water flow over the spillway once installed.
Mark Base Location
Once you’ve established level ground, marking the precise base location guarantees accurate waterfall placement and safe installation. Before setting any stakes or ribbon to outline your waterfall’s footprint, you’ll need to contact utility companies to mark underground lines and confirm local ordinances compliance.
Evaluate your site for adequate space, ensuring you’ve got room for the waterfall structure, plumbing components, and future maintenance access. You’ll want to measure the intended base dimensions, adding extra inches for structural offsets, typically one inch on each side and 3-3.5 inches below unit depth. Mark your perimeter using bright ribbon or string, and establish a separate staging area for tools and materials. Keep this staging zone level, dry, and close enough for efficient workflow while maintaining safe distance from your excavation site.
Clear Surrounding Area
While proper site preparation forms the foundation of any successful pool waterfall installation, clearing the surrounding area demands painstaking attention to detail. To prepare ground properly, you’ll need to remove all rocks, sticks, and organic debris that could damage your equipment or compromise stability. Make sure to uproot any grass and weeds to prevent regrowth beneath the structure. Consider using faux rock materials for your waterfall structure to ensure easier installation and handling during the site preparation phase.
Create a dedicated staging area for your tools and materials away from the pool’s edge, and establish clear pathways for equipment access. To reduce erosion risks, assess drainage patterns and install temporary barriers if needed. Don’t forget to check for underground utilities before any excavation work. Remove all hazardous objects and secure the work zone from children and pets to maintain a safe installation environment.
Setting Up the Plumbing System
Setting up the plumbing system kicks off with selecting the right materials and sizing your pipes correctly. You’ll need schedule 40 PVC pipe, with a minimum 1.5-inch diameter to guarantee proper waterfall flow rate. This cost-effective piping material delivers both durability and reliable performance for your installation.
Proper pipe selection and sizing are crucial, schedule 40 PVC with 1.5-inch diameter ensures optimal waterfall performance and longevity.
- Install ball valves at strategic points to control water flow and enable easy maintenance access
- Connect pipes using threaded couplers and ascertain watertight seals with appropriate silicone sealant
- Place unions at key junctions to facilitate future repairs without cutting into the plumbing
Remember to pressure test all connections before final installation. If you’re using your pool’s existing pump, make certain it can handle the supplementary load, you’ll need a flow rate approximately double your waterfall’s width. Position all plumbing components for straightforward access during routine maintenance.
Building the Structural Foundation
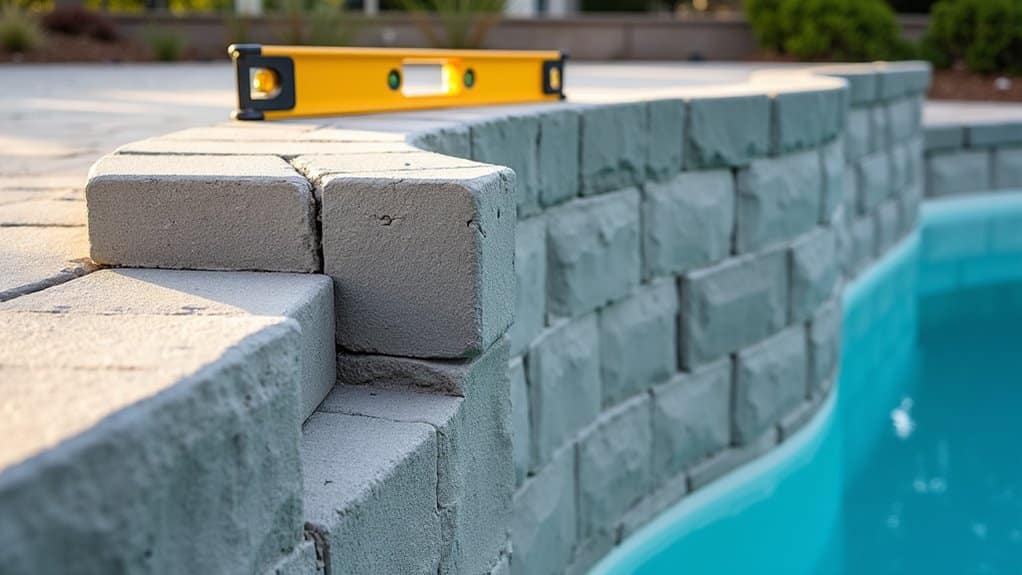
A solid structural foundation serves as the backbone of your pool waterfall installation, building upon the plumbing system we’ve established. Begin by evaluating your soil’s stability and guaranteeing proper drainage to maintain structural integrity. You’ll need to excavate the site to create a level, compacted base that can support the waterfall’s weight. Consider using pre-cast cement blocks as your substructure foundation before surrounding it with rockwork.
For ideal concrete strength, install rebar or steel reinforcement at least 1 inch into the substrate. Build your foundation 2 inches wider than the waterfall unit, using concrete, compacted gravel, or cement blocks. Don’t forget to incorporate notches for plumbing and electrical access. Apply a waterproofing membrane and ensure a minimum 1/8 inch overhang for the waterfall lip. The 6-inch waterfall lip must be installed and supported deeper into the substrate for proper stability. Check local building codes and secure necessary permits before proceeding with any foundation work.
Installing the Waterfall Unit
Start by ensuring your waterfall unit’s base is perfectly level using shims and a spirit level, as uneven installation will result in irregular water flow. You’ll need to connect the plumbing lines to the unit’s inlet ports using appropriate PVC fittings and primer/cement, making sure the pipes are properly supported and aligned. Ultimately, waterproof all joints and connection points with silicone sealant or M-1 adhesive to prevent any water infiltration that could compromise the installation’s integrity.
Level and Secure Base
Before installing your waterfall unit, establishing a properly leveled and secured base proves critical for long-term stability and ideal water flow. Start with concrete slab preparation by excavating to a depth of 4 inches, ensuring proper soil compaction. Conduct a site elevation assessment using a laser level to guarantee precise grading across the foundation area. For stainless steel waterfalls, leave 5cm of plumbing pipe extending above the finished surface.
- Pour a reinforced concrete pad with proper rebar patterns, maintaining 6-8 inches of clearance for PVC piping
- Install pressure-treated lumber blocks at key support points for further stability
- Apply waterproof sealant around attachment points to prevent water infiltration
Use masonry anchors and deck screws to secure the base, incorporating washers where needed. Maintain a 2-3 cm gap between the waterfall mouth and pool wall while checking for level at multiple points before final anchoring.
Plumbing Connection Setup
Proper plumbing connection setup forms the foundation of your waterfall’s performance and longevity. You’ll need to begin by marking and excavating a centered channel in your bond beam, allowing 1″ clearance on each side and 3.5″ below for proper unit fitting.
For your waterfall pump configuration, connect 1.5″ Schedule 40 PVC pipe to the unit’s back, extending it beyond the bond beam temporarily. Your power source selection will determine whether you’re using the main pool filter pump with a three-way valve or installing a dedicated pump system. Install control valves for each line, and if you’re setting up multiple units, incorporate an equal pressure loop.
Ensure you’re wrapping all threaded connections with Teflon tape and pressure test the system before final attachment to prevent future leaks.
Waterproof All Joints
While installing your waterfall unit, thorough joint waterproofing stands as the critical barrier between success and potential water damage. Begin by ensuring all surfaces are clean and debris-free. Apply high-quality pond foam or silicone sealant continuously along seams, allowing proper cure times between applications.
For ideal waterproofing performance:
- Pre-cut underlayment to precise dimensions and position materials tightly to eliminate gaps
- Use industrial shears to trim liners flush against rocks, then seal with Aqua Block XL or specialized products
- Test all joints with gentle pressure and inspect for voids before running water
Maintain regular inspection frequency, especially after seasonal changes. You’ll need to monitor for weathering or cracking and address any compromised seals immediately. Remember to winterize your waterfall by draining and covering exposed areas to prevent freeze-thaw damage.
Connecting Water Lines and Testing
Once you’ve completed the main plumbing framework, connecting the water lines and testing the system requires careful attention to detail and precise installation techniques. You’ll need to install schedule 40 PVC piping, ensuring proper valve placement at strategic points for flow control and maintenance access.
Connect your 1.5″ diameter PVC pipe to the waterfall unit’s back, applying glue and twisting connections 1/4 turn to eliminate air bubbles. Install ball valves and unions at key locations, then follow pressure testing protocols by checking all connections before covering with concrete. For multi-waterfall systems, you’ll need individual valves to balance water distribution. Don’t forget to thoroughly clean pipes before startup and maintain a safe separation distance between plumbing and electrical conduit. Once concrete cures, test water flow and adjust ball valves to achieve your desired cascade effect.
Waterproofing and Sealing
Before applying any waterproofing materials to your pool waterfall, you’ll need to prepare and seal multiple surface types to prevent water infiltration and structural damage. Guarantee proper adhesion requirements by thoroughly cleaning all surfaces and removing loose debris with a stiff brush. For concrete areas, consider using cementitious membranes like Gripset 2P, maintaining suitable film thickness according to manufacturer specifications.
- Apply waterproof sealant around all penetrations, particularly where water lines connect to the waterfall structure
- Use exterior-grade silicone beneath skimmer installations and seal all joints with construction tape during curing
- Install multiple layers of penetrating sealer on porous stone surfaces, ensuring complete coverage in high-flow areas
For ideal results, spray-apply waterproofing products on irregular surfaces while using brush application for precise coverage in tight spaces. Test all sealed areas thoroughly before running water through the system.
Adding Decorative Rock Features
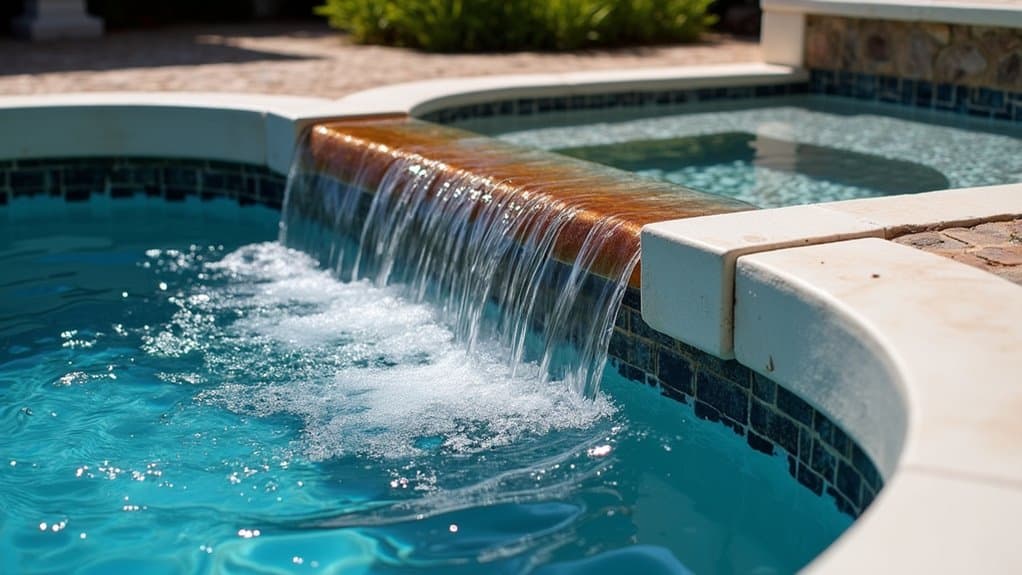
After securing proper waterproofing, selecting the right decorative rocks stands as your next major decision point. You’ll need to choose between natural stone options like Tennessee flagstone or granite blocks, versus polyurea-based artificial rocks that offer greater flexibility and consistent coloring. Consider your desired height and water flow, larger features requiring 2-HP pumps need substantial granite blocks, while modern designs benefit from flagstone’s even water sheets.
When integrating plants into waterfall design, create dedicated pockets within the rock structure for succulents and native ferns. These plant selections require minimal maintenance while enhancing authenticity. Focus on utilizing natural color variations by selecting rocks with complementary brown or grey base tones. Position accent boulders strategically around your pool’s perimeter to achieve visual continuity with your waterfall feature.
Final Testing and Landscaping
While your waterfall structure stands complete, extensive testing and proper landscaping integration remain crucial for long-term success. Start with a 24-hour water test to detect leaks, adjust flow rates using ball valves, and verify pump functionality. After confirming water system integrity, focus on creating aesthetically pleasing landscaping that augments your waterfall feature.
Key post-installation adjustments include:
- Installing slip-resistant surfaces and proper lighting for safety
- Selecting water-friendly plants that heighten the visual appeal
- Implementing a regular maintenance schedule for pump and water quality
Ensure all electrical connections meet local codes and conduct thorough pressure tests on plumbing joints. Remember to balance water distribution across the feature and apply waterproof sealant where needed. Your attention to these technical details will result in a safe, functional, and visually striking water feature.
Frequently Asked Questions
How Long Does a DIY Pool Waterfall Typically Last Before Needing Repairs?
You’ll typically get 5-15 years from your DIY pool waterfall before major repairs are needed, though seasonal factors can impact this timeline. To optimize longevity, you’ll need to monitor structural integrity through regular inspections and maintenance. Watch for leaks, cracks, or pump issues, especially after winter. You should perform minor repairs annually and maintain proper water chemistry to prevent premature deterioration of plumbing components and waterfall materials.
Can I Install a Waterfall on an Existing Above-Ground Pool?
Yes, you can install a waterfall on your existing above-ground pool. The waterfall pump placement needs to connect directly to your pool’s return line, making installation straightforward. You’ll want to choose a waterfall feature design that’s specifically made for above-ground pools to guarantee compatibility. The process typically takes about 5 minutes and doesn’t require any major modifications. Just verify you’re following the manufacturer’s guidelines for secure attachment and proper water flow.
Will a Pool Waterfall Significantly Increase My Monthly Electricity Costs?
Your monthly electricity costs will increase, but the impact depends on several energy consumption factors. A typical 500-watt waterfall pump running 8 hours daily adds about $18 to your monthly bill at average U.S. rates. You’ll see lower operating cost considerations if you use an energy-efficient pump or integrate the waterfall with your existing filtration system. Installing a timer and limiting operation to specific hours can substantially/dramatically/markedly reduce your expenses.
Does Winter Weather Require Special Maintenance for Pool Waterfalls?
Yes, you’ll need specific winter maintenance requirements to protect your waterfall from freeze damage. You must completely drain all water from the basin, pipes, and pump system before freezing temperatures hit. Make seasonal water flow adjustments by shutting off and storing your pump indoors. Don’t forget to cover your waterfall with a UV-resistant waterproof cover, and inspect for cracks or leaks that could worsen during freeze-thaw cycles.
Can I Change the Waterfall’s Sound Level After Installation?
Yes, you can easily adjust your waterfall’s sound level through several methods. The most immediate control comes from your pump’s adjustable flow rate, simply decrease the speed for quieter operation or increase it for more volume. You’ll also get variable sound volume by installing a valve to regulate water flow. For permanent noise reduction, try adding rocks beneath the fall or installing a skew plate at the cascade’s edge.